

The scene partner in your pocket.
SideKick reads the other characters and follows your cues, so you can rehearse and self-tape without a partner.
Five steps:
Free: up to 3 scenes, recording your own reader lines (Record), rehearsing, self-tapes and the Apple Watch remote. New accounts can import up to 10 pages in their first 7 days.
Pro: no scene limit, PDF import, and the Direct and Generate reader voices. Each month, Pro includes 150 import pages and 25 minutes of Directed and Generated reader audio.
SideKick needs iOS 18.2 or later.
Import your sides
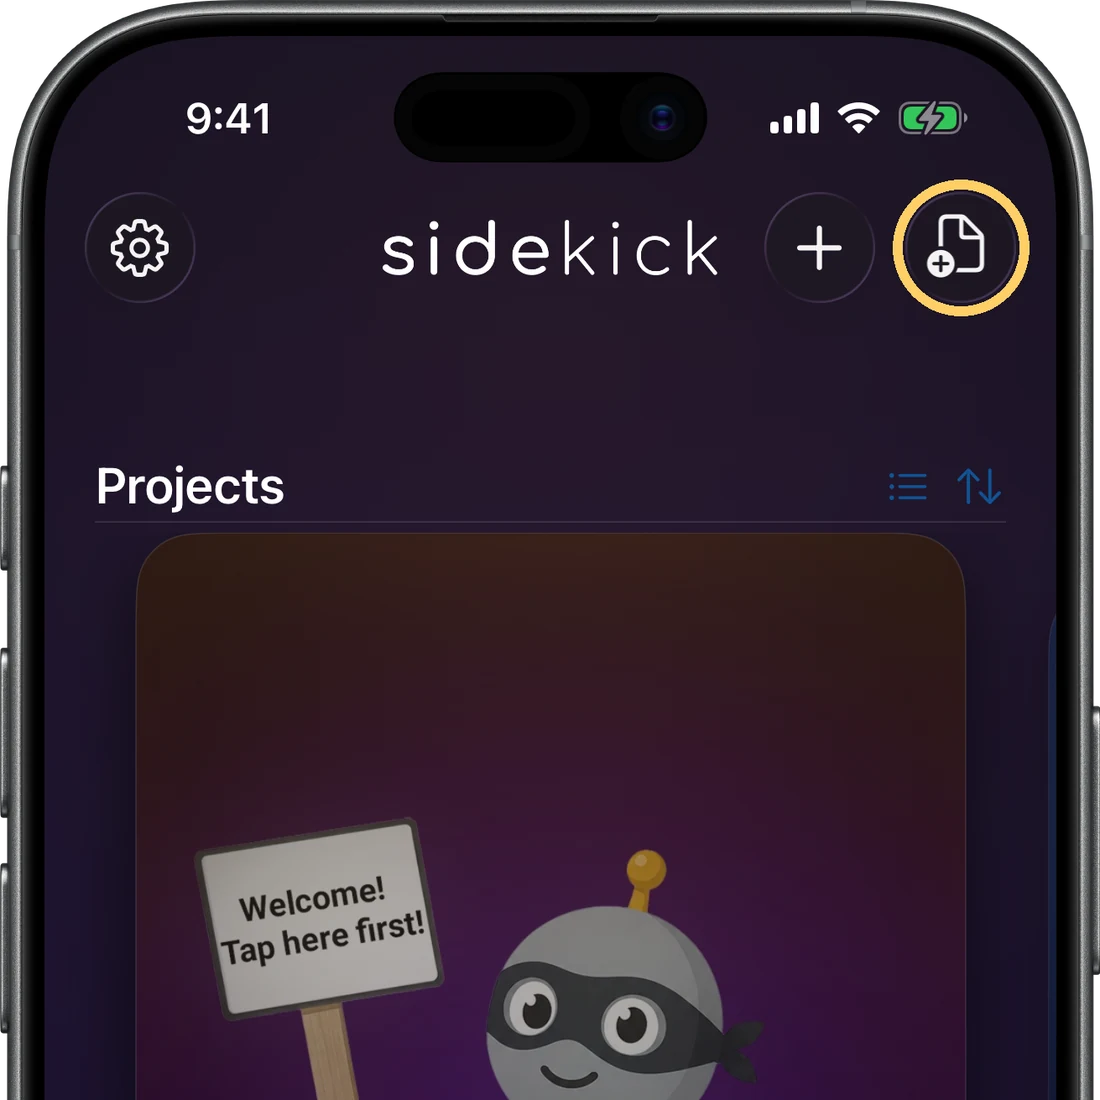
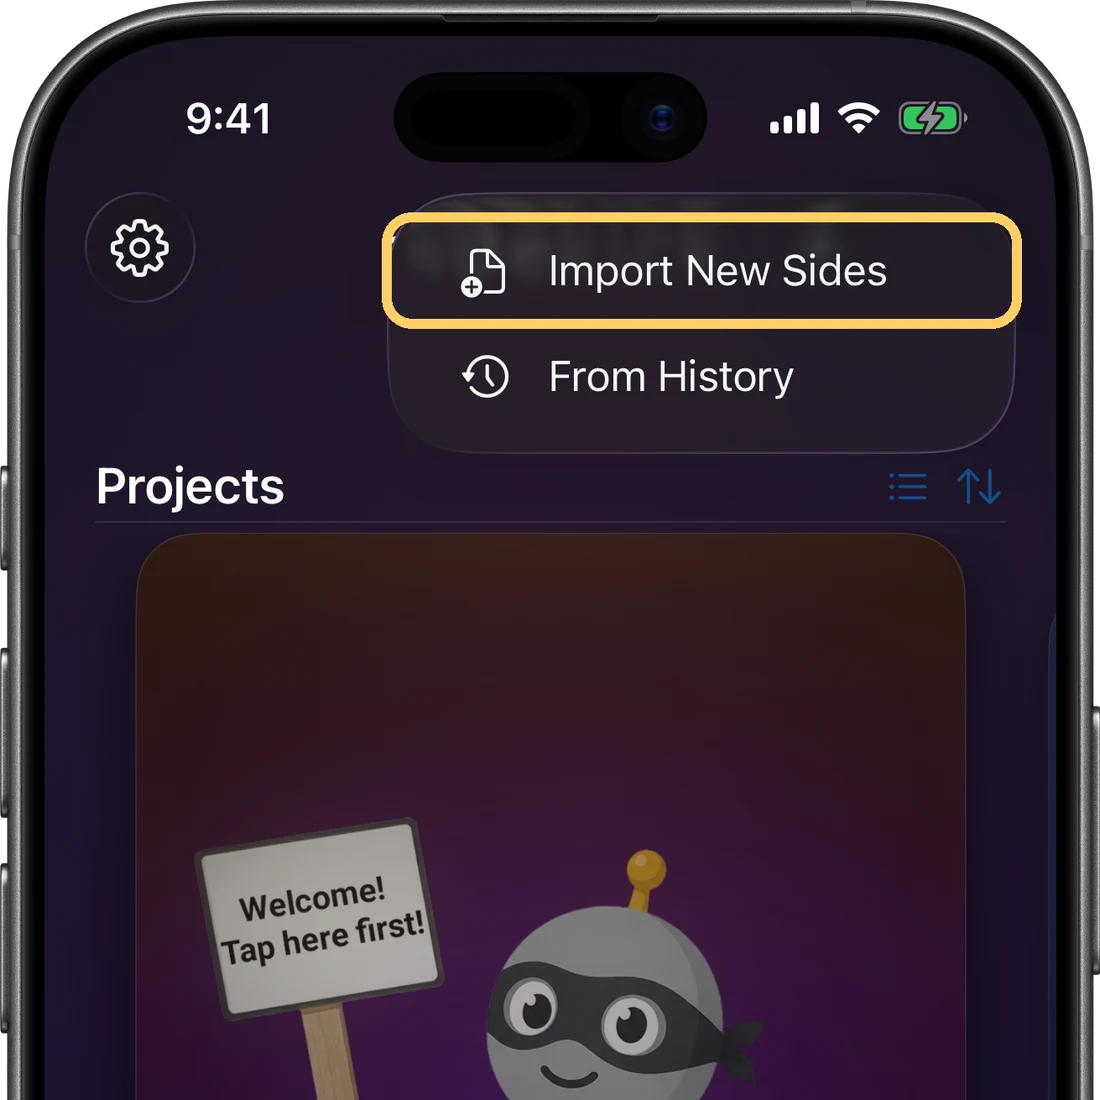
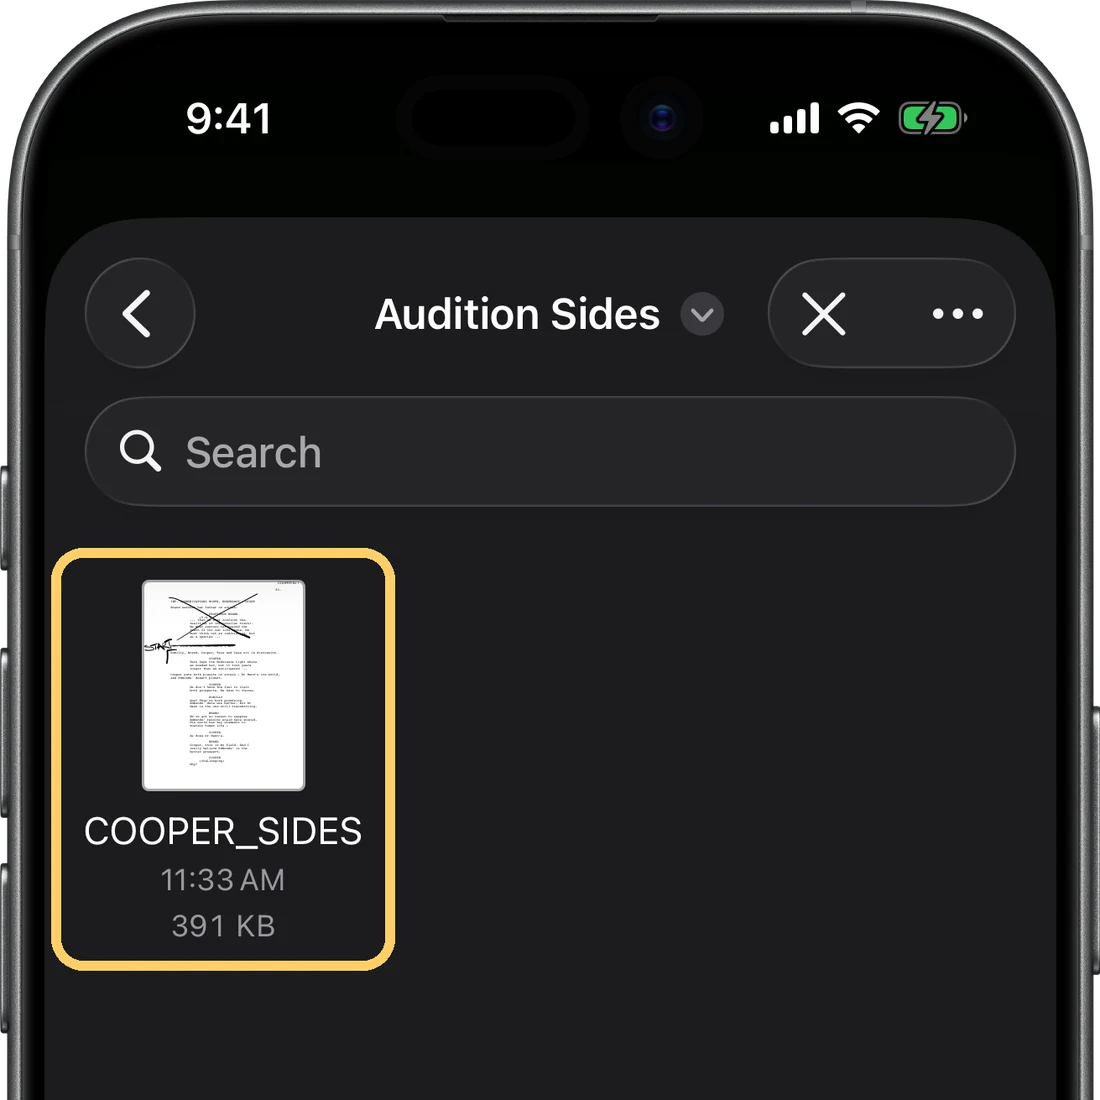
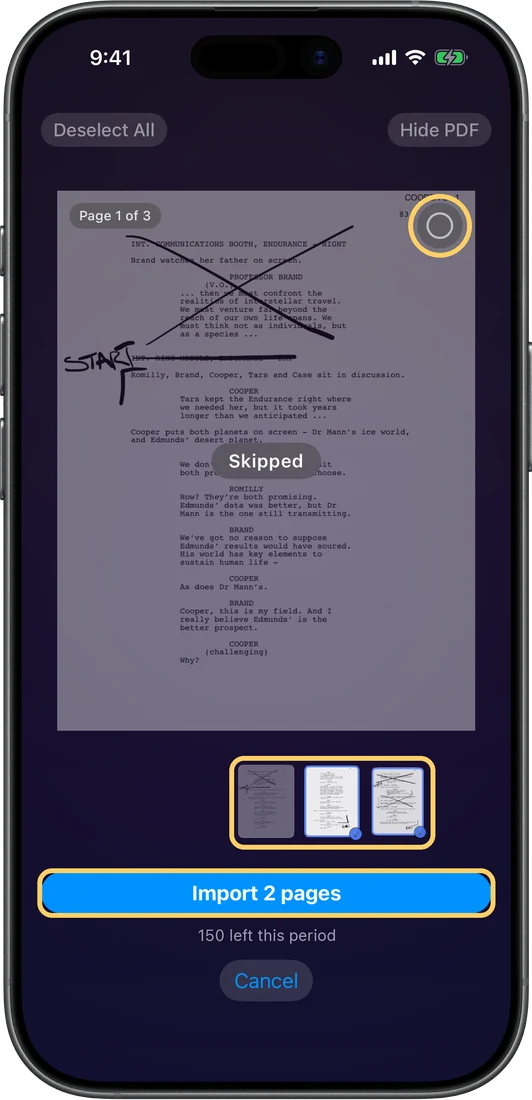
Most auditions arrive as a PDF. SideKick reads your PDF, finds the lines and characters, and builds the scene. Seven small steps.
SideKick 101Want to look around first? Try the Welcome to SideKick scene waiting in the Start Here project.
 SideKick 101
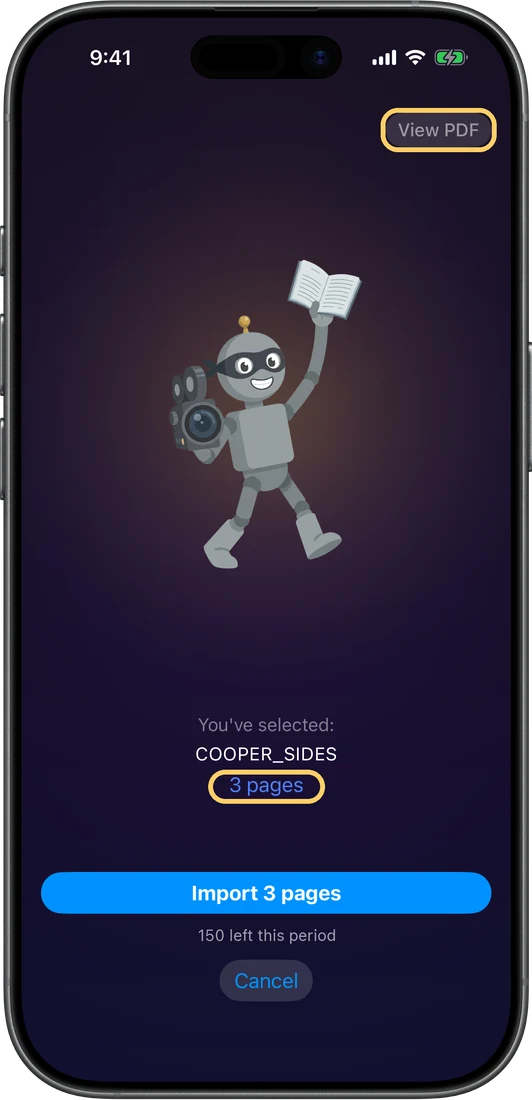
Up to 12 pages per import. If your PDF is longer, you can select only the pages you need. We highly recommend deselecting any instructional or cover pages from casting offices.
 SideKick 101
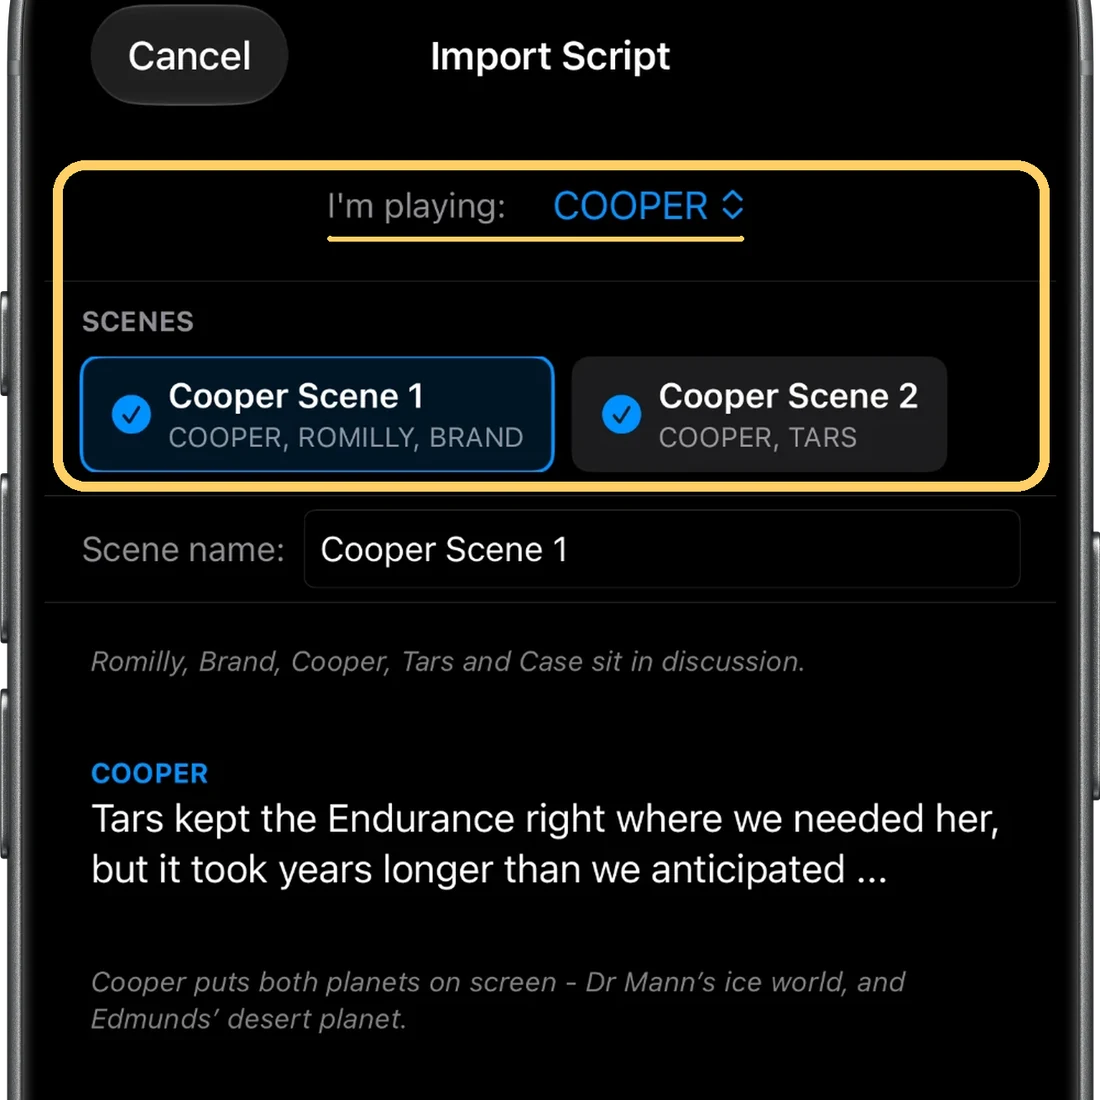
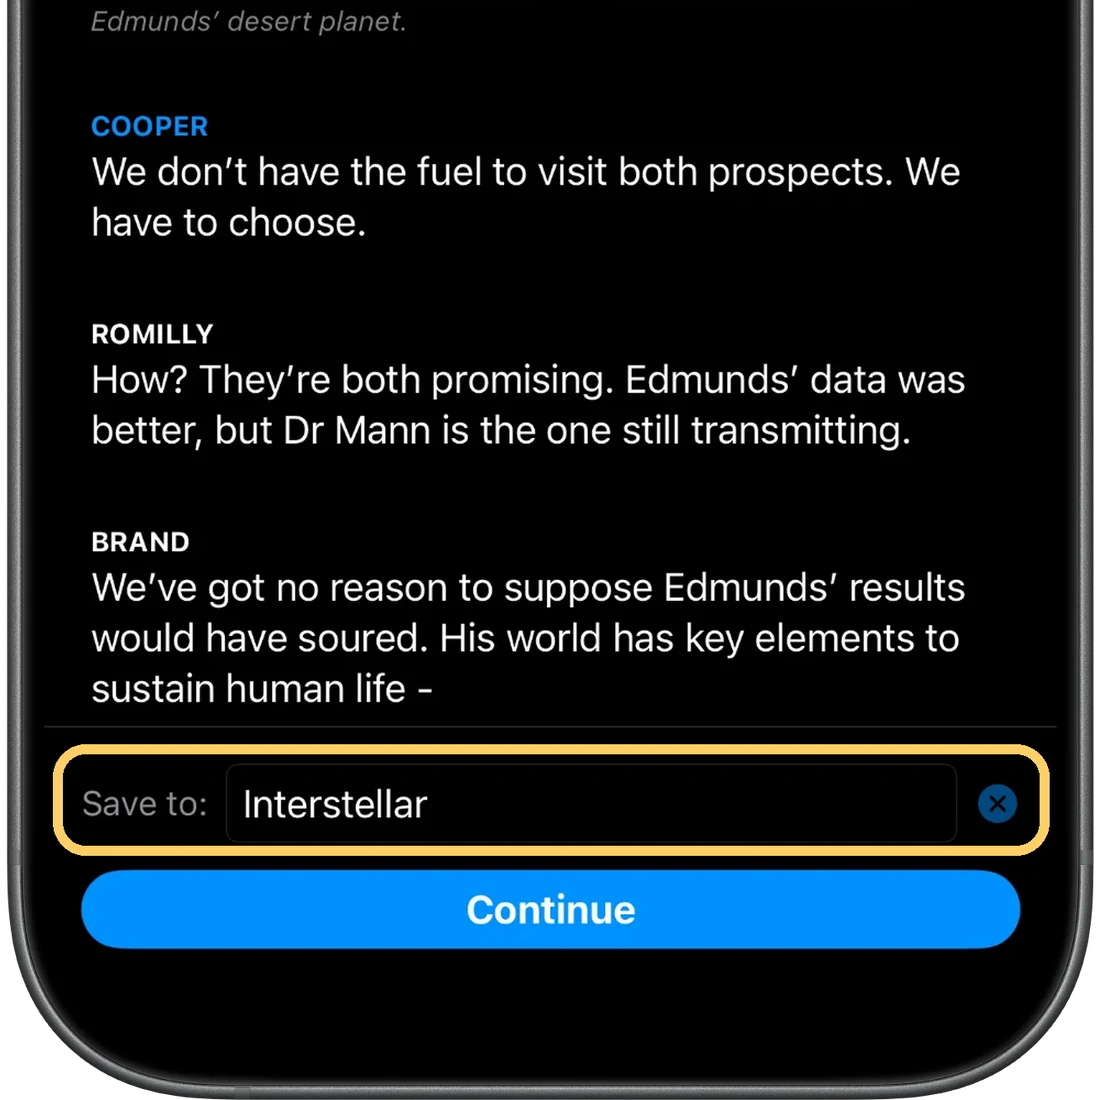
On the review screen, swipe a line right to flip it between Myself and Reader, or swipe left to delete it. You can rename a scene, and tick several scenes to import them together. Continue stays grey until at least one scene is ticked.
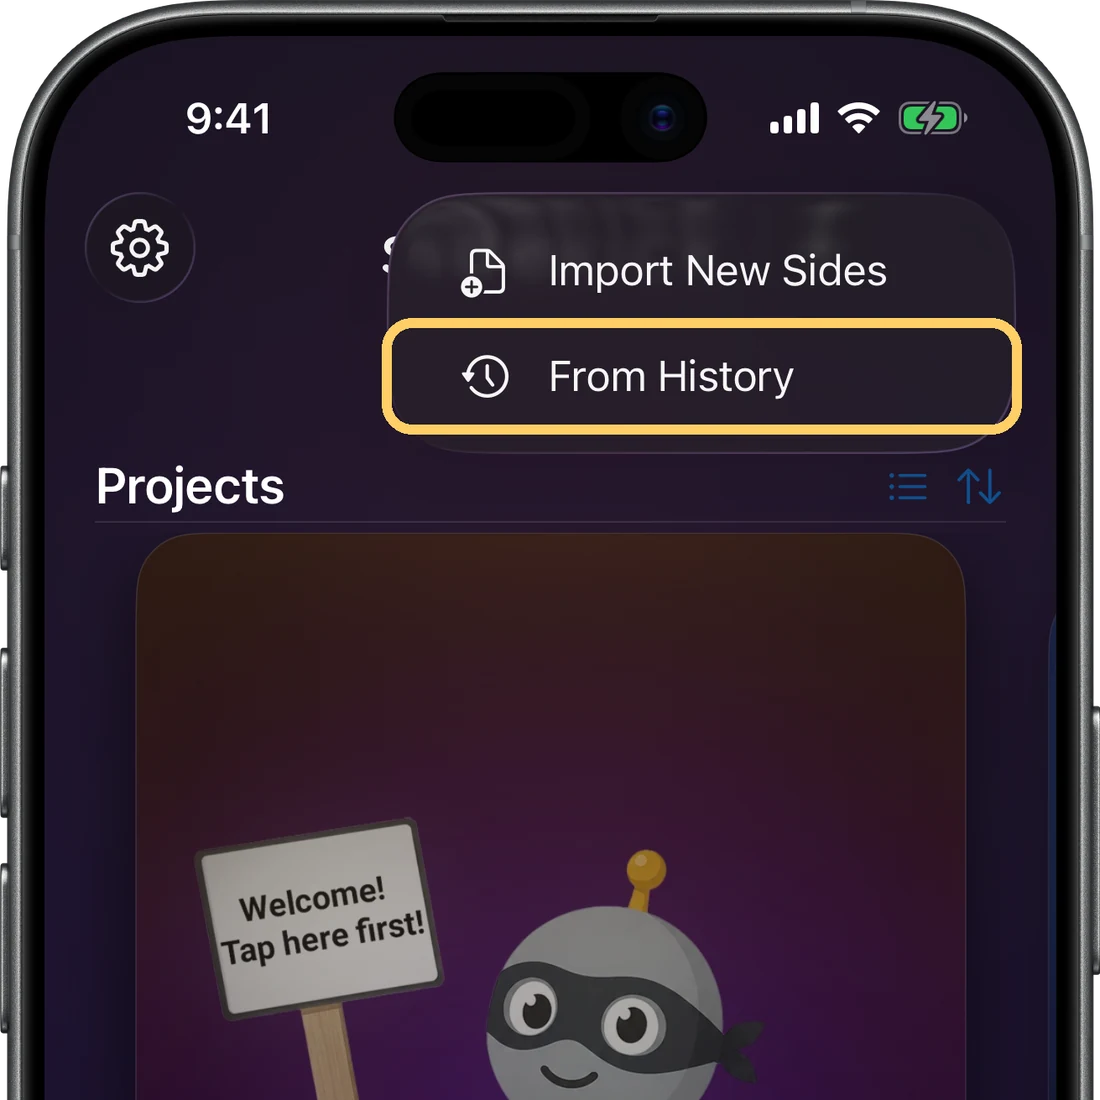
.sidekick file they sent (from Files or AirDrop) and SideKick adds it to your Auditions project.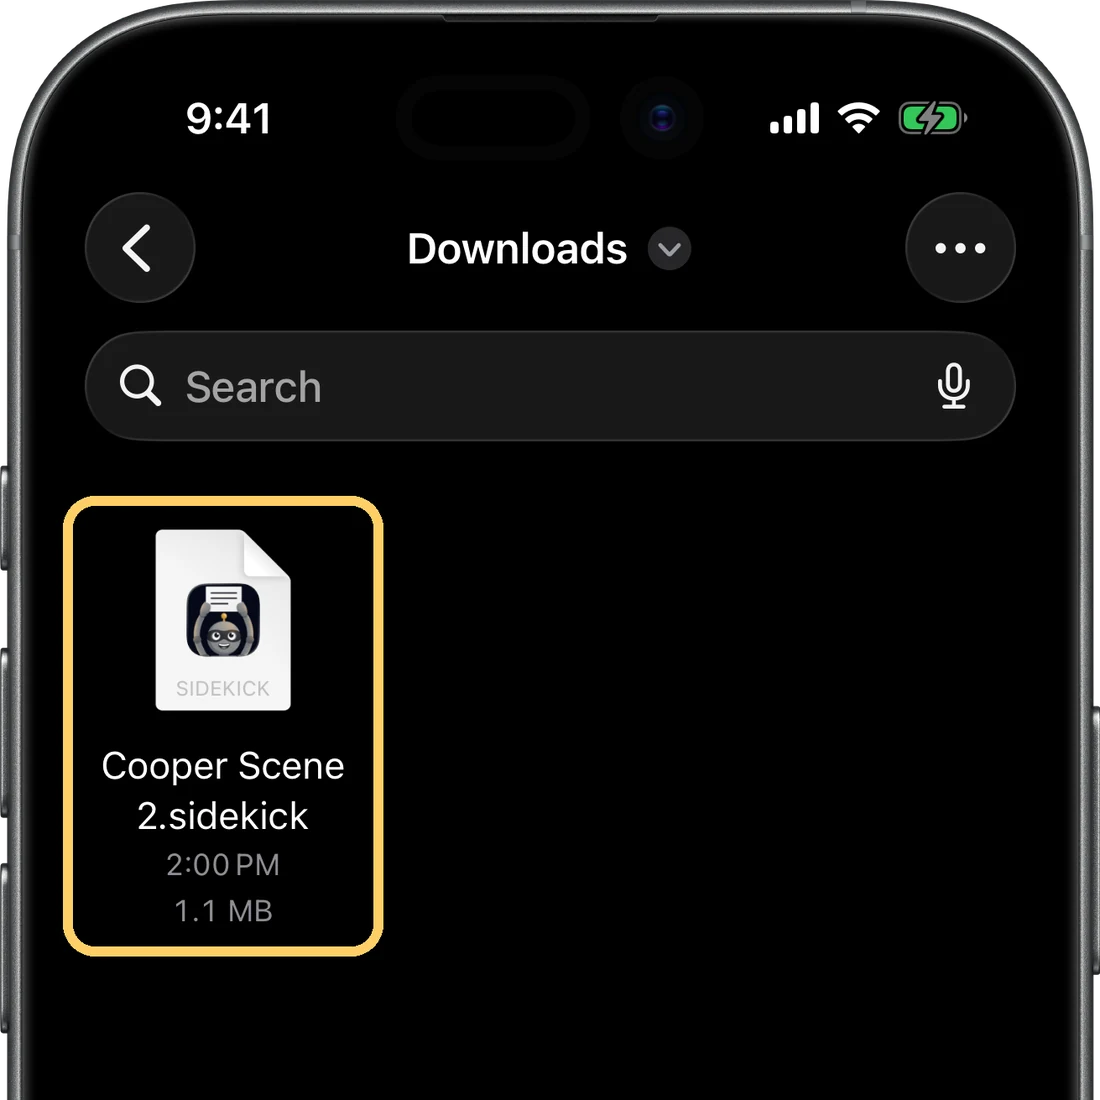
Cast the reader
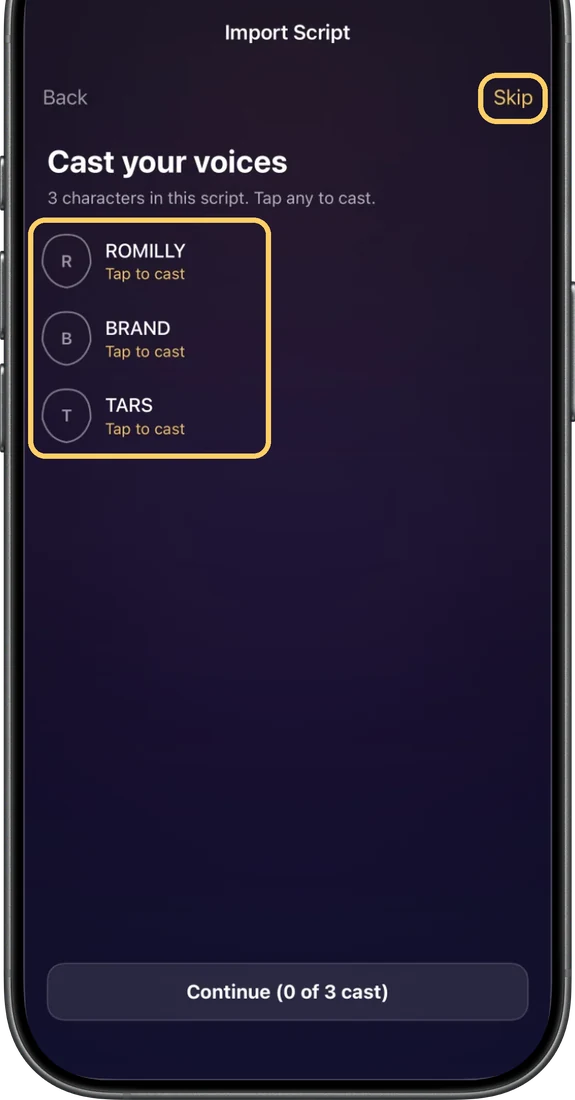
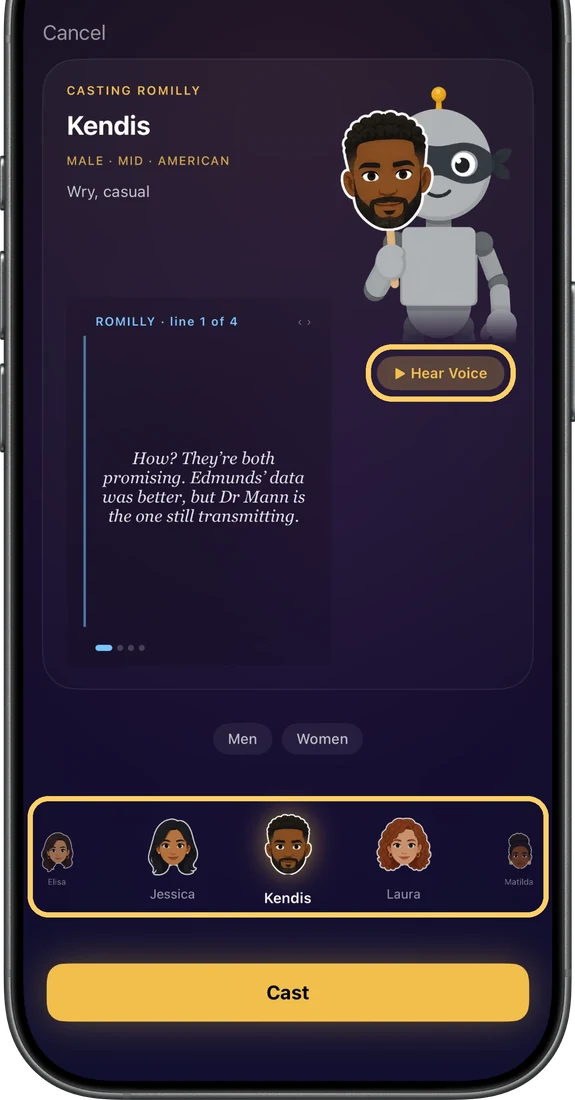
Every character except yours needs a voice. Cast a SideKick Persona for each, or skip it and record the reader lines in your own voice.
 SideKick 101
Skipping isn't permanent! You can cast later from the scene.
Add reader audio
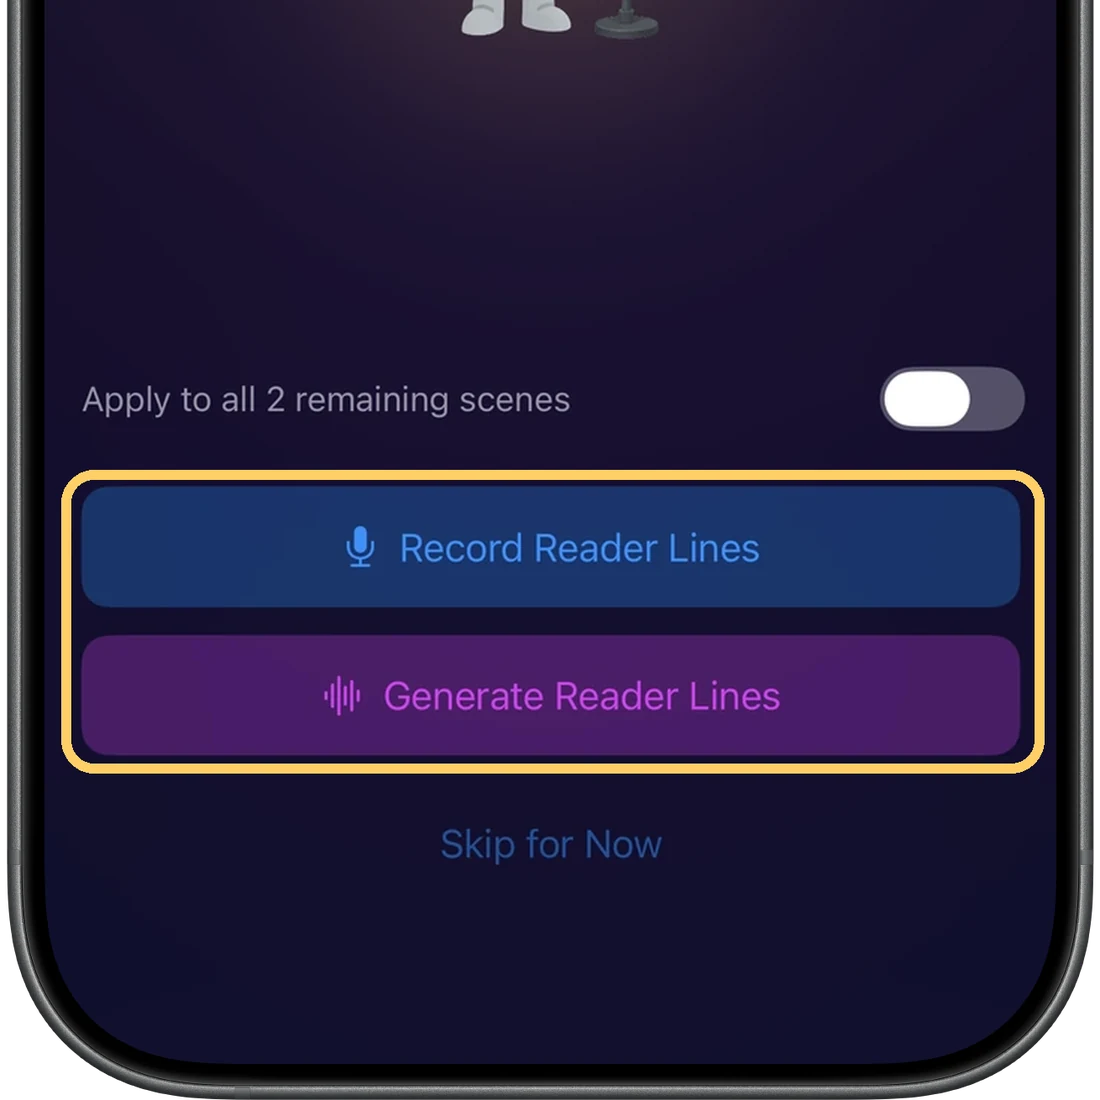
There are three ways to give a reader a voice, and you can mix them in one scene.
Direct: read the reader's lines yourself, with your own timing and feeling, and SideKick turns your performance into the cast Persona's voice.
Record: read the lines aloud and keep your own voice as the reader. Free.
Generate: your chosen Personas read each reader line from the script's text.
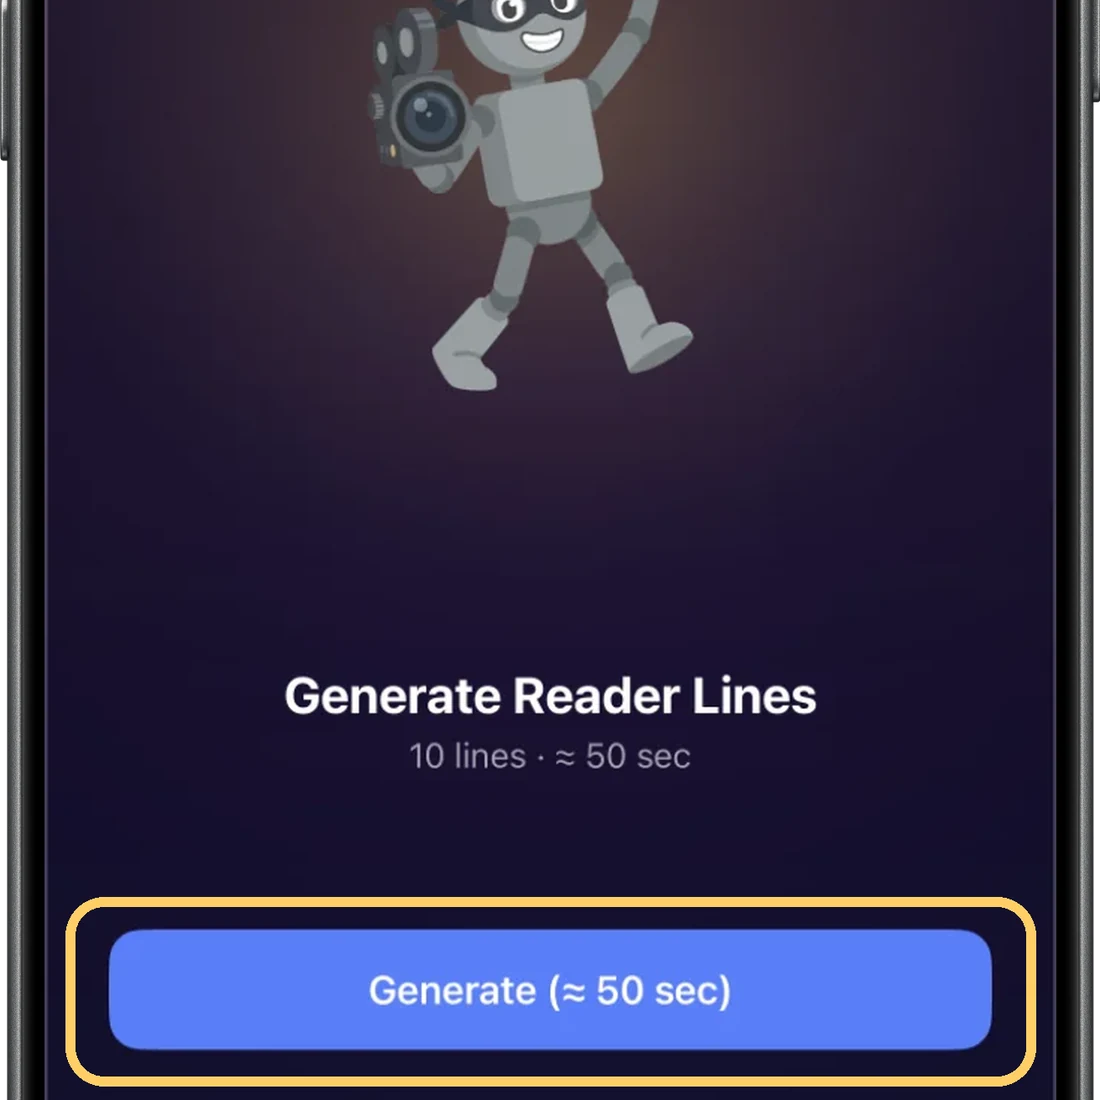
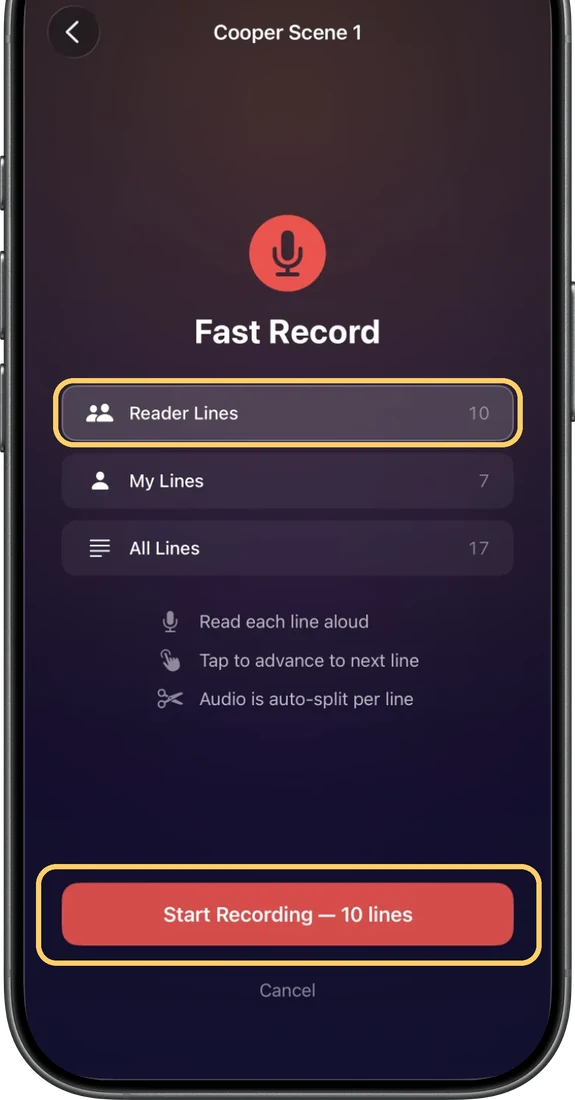
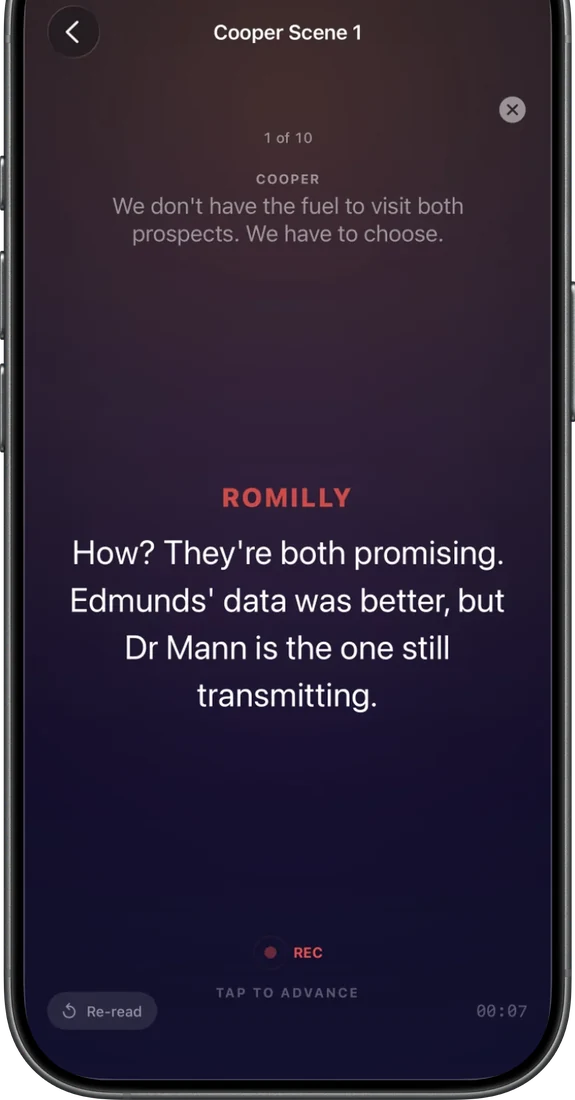
 SideKick 101
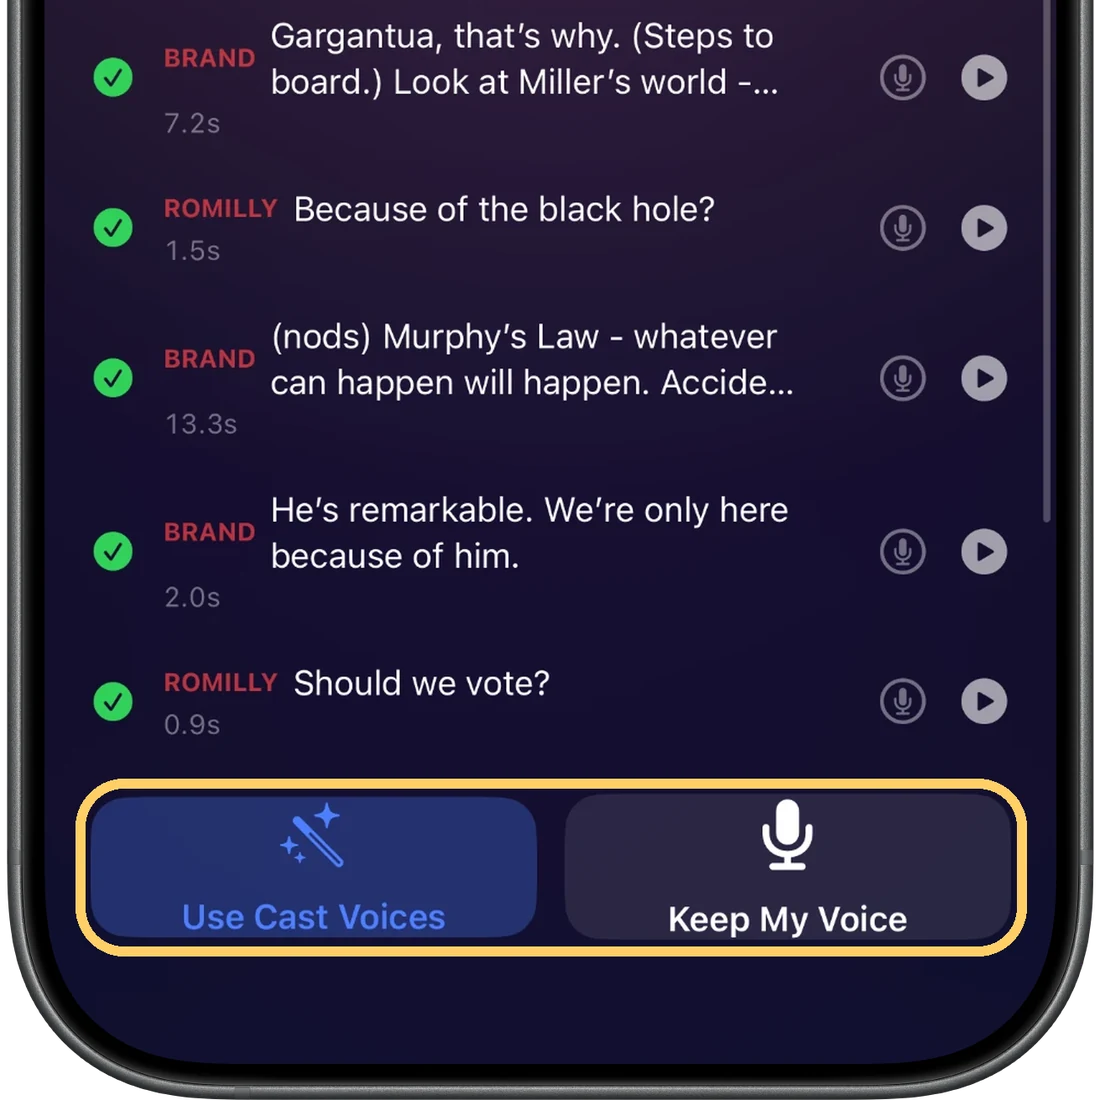
On the finished screen you can play any line back to hear it, or tap the mic to re-record just that one. Edit a line's text later, from the scene. "Use Cast Voices" keeps your original recordings, so you can switch back anytime.
Rehearse
Four ways to run the scene, from fully manual to fully hands-free.
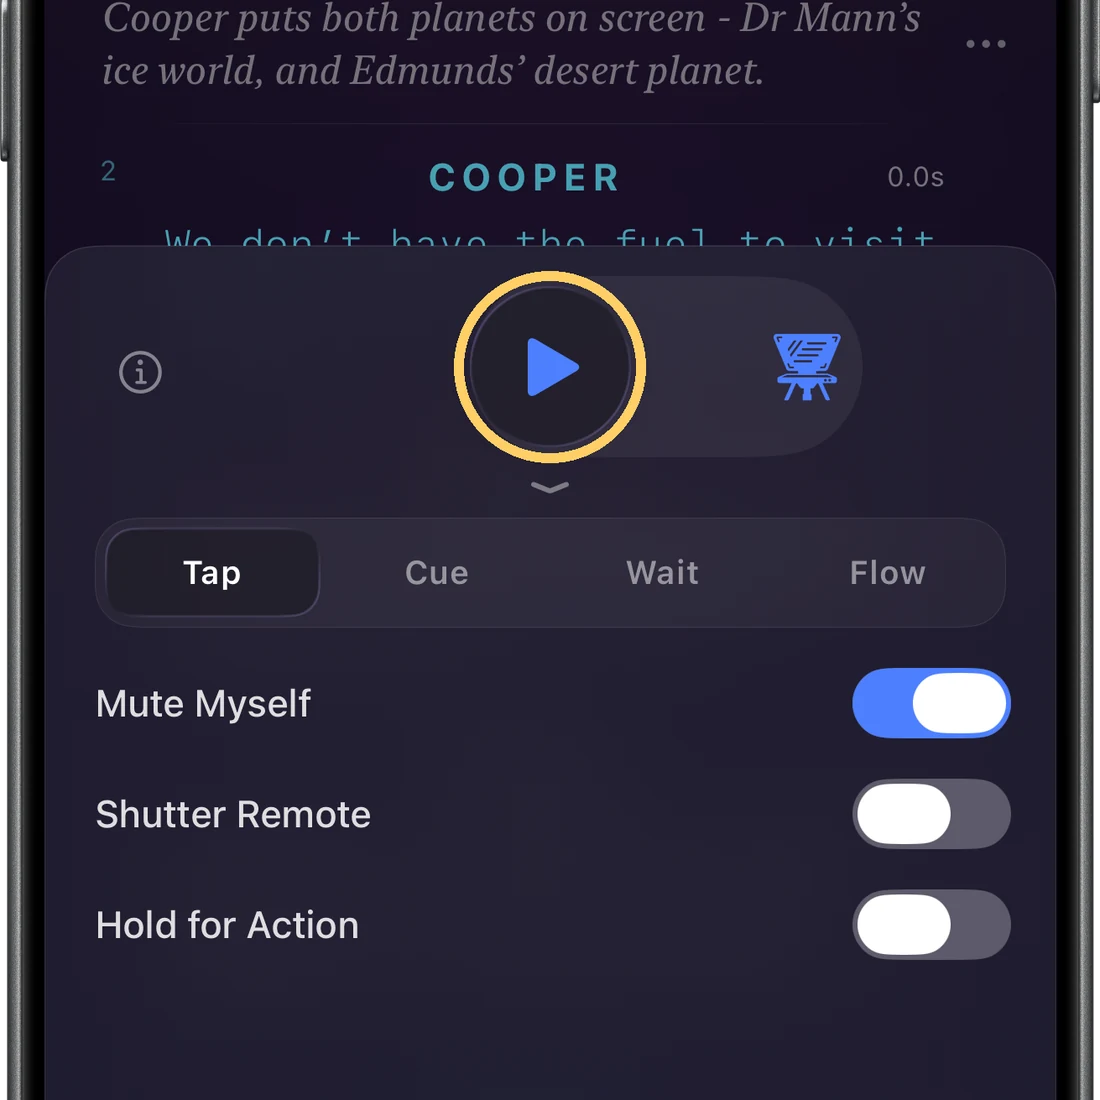
SideKick 101Swipe up on the play button to open the mode picker.



Choose how the scene advances:
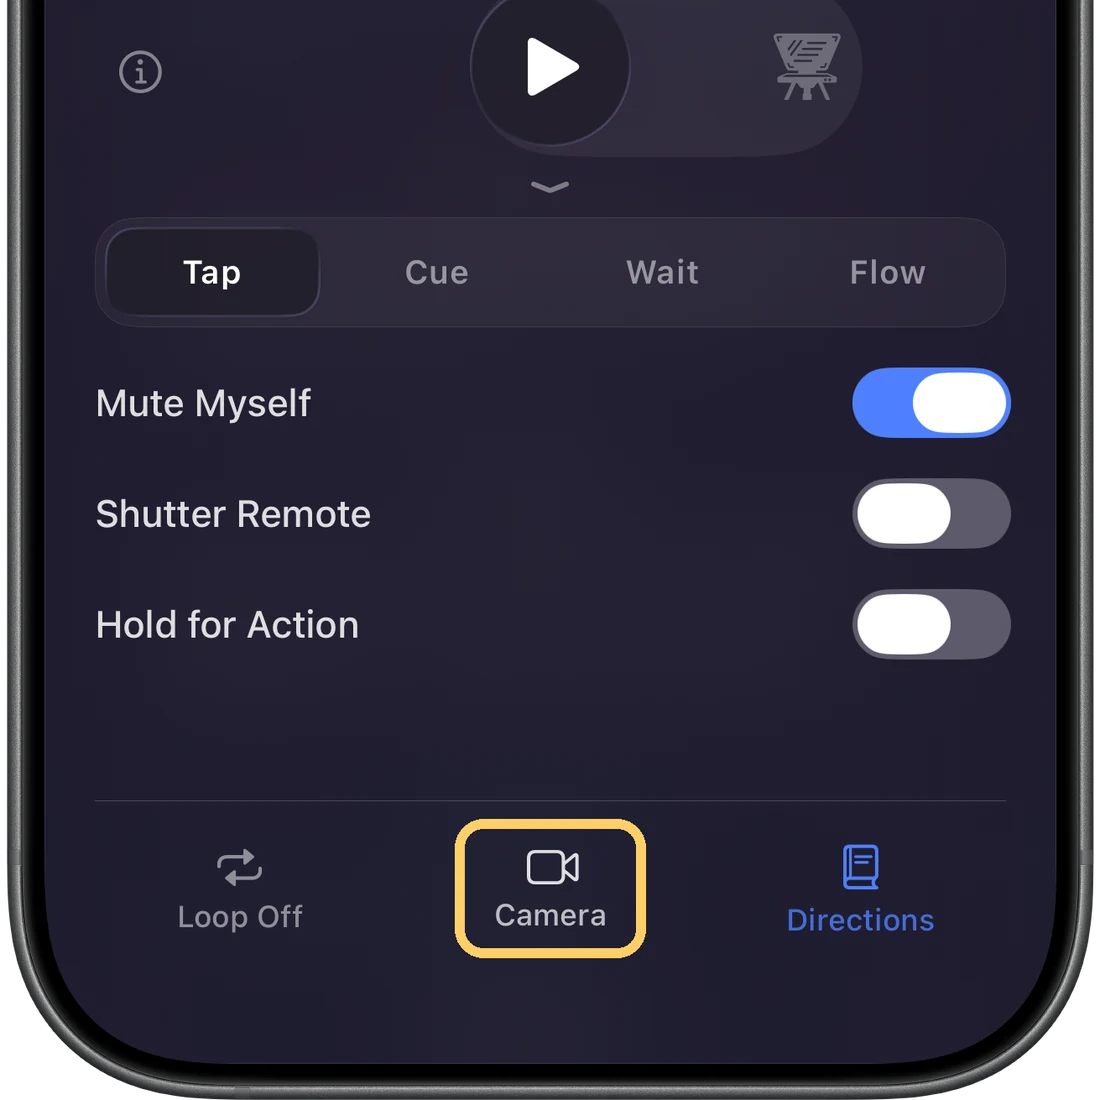
Tap: you advance every line yourself. Tap the screen, use a Bluetooth shutter remote, or an Apple Watch with the SideKick companion app.
Cue: say your line; the reader answers on your cue. SIMPLE listens for your last words. SMART listens to the whole line.
Wait: the reader waits until you finish speaking.
Flow: the scene plays straight through.
SideKick 101
The switches under each mode:
- Hold for Action (Tap, Cue and Wait): when the reader speaks first, the scene waits for your signal to start. Say "Action" in Cue or Wait modes, or tap in Tap mode.
- Mute Myself (Tap and Flow): keeps your own recorded lines silent.
- Pause before advancing (Smart Cue), Silence until next line (Wait) and Delay Between Lines (Flow): how long SideKick waits.
- Tap the (i) button to read what a mode does.
Flow only works when every line has audio, including your own. If one is missing, a Missing Audio screen offers Fast Record, Generate or Continue Anyway.
The reader's volume, pitch and speed are set per scene. See Edit lines, voices & audio.
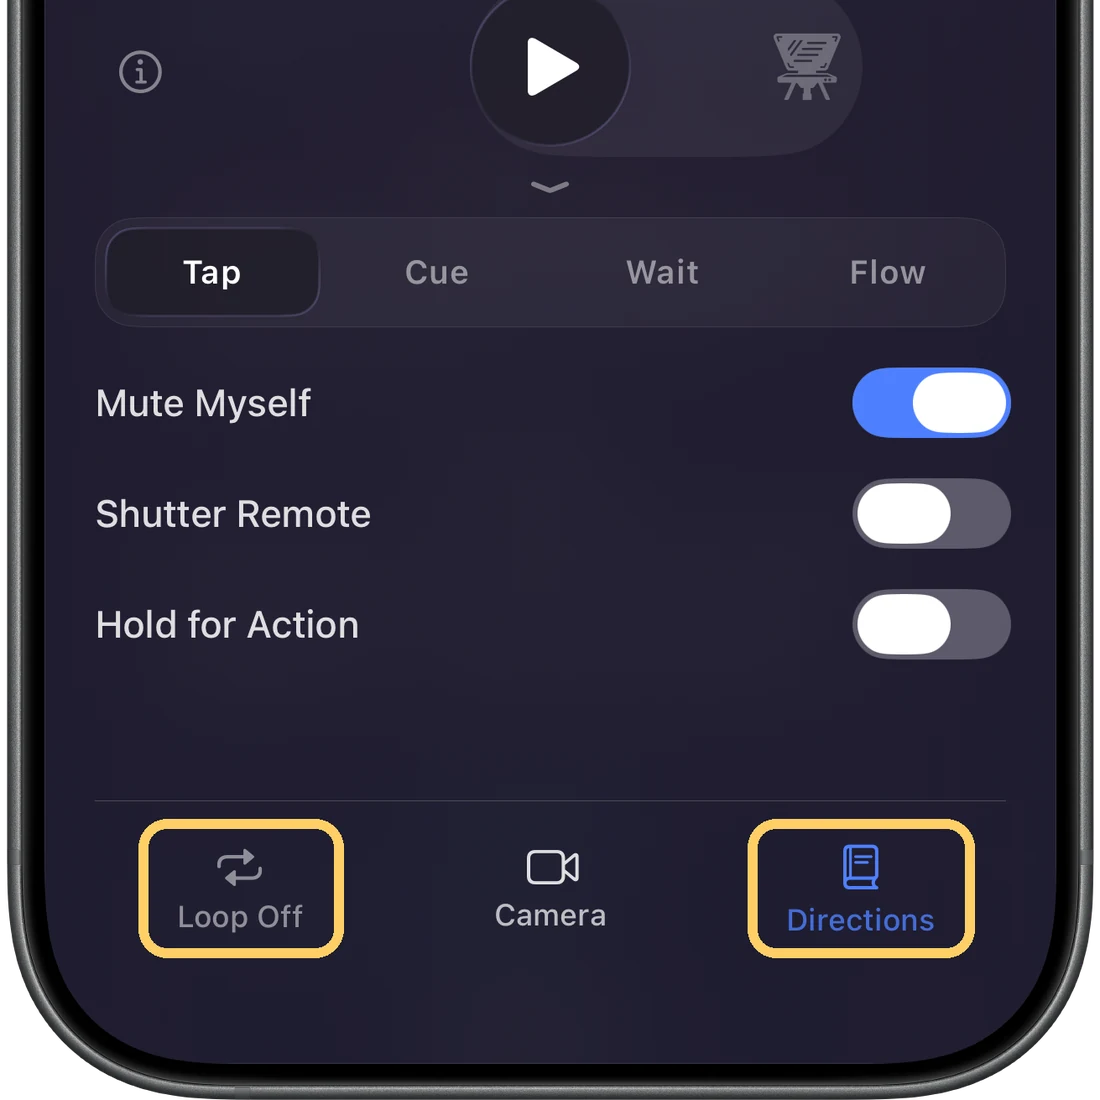
Loop repeats the scene from the top when it ends.
Directions shows or hides the stage directions.
Each press of a Bluetooth shutter remote skips to the next line. Turn on Shutter Remote in any of these three places:
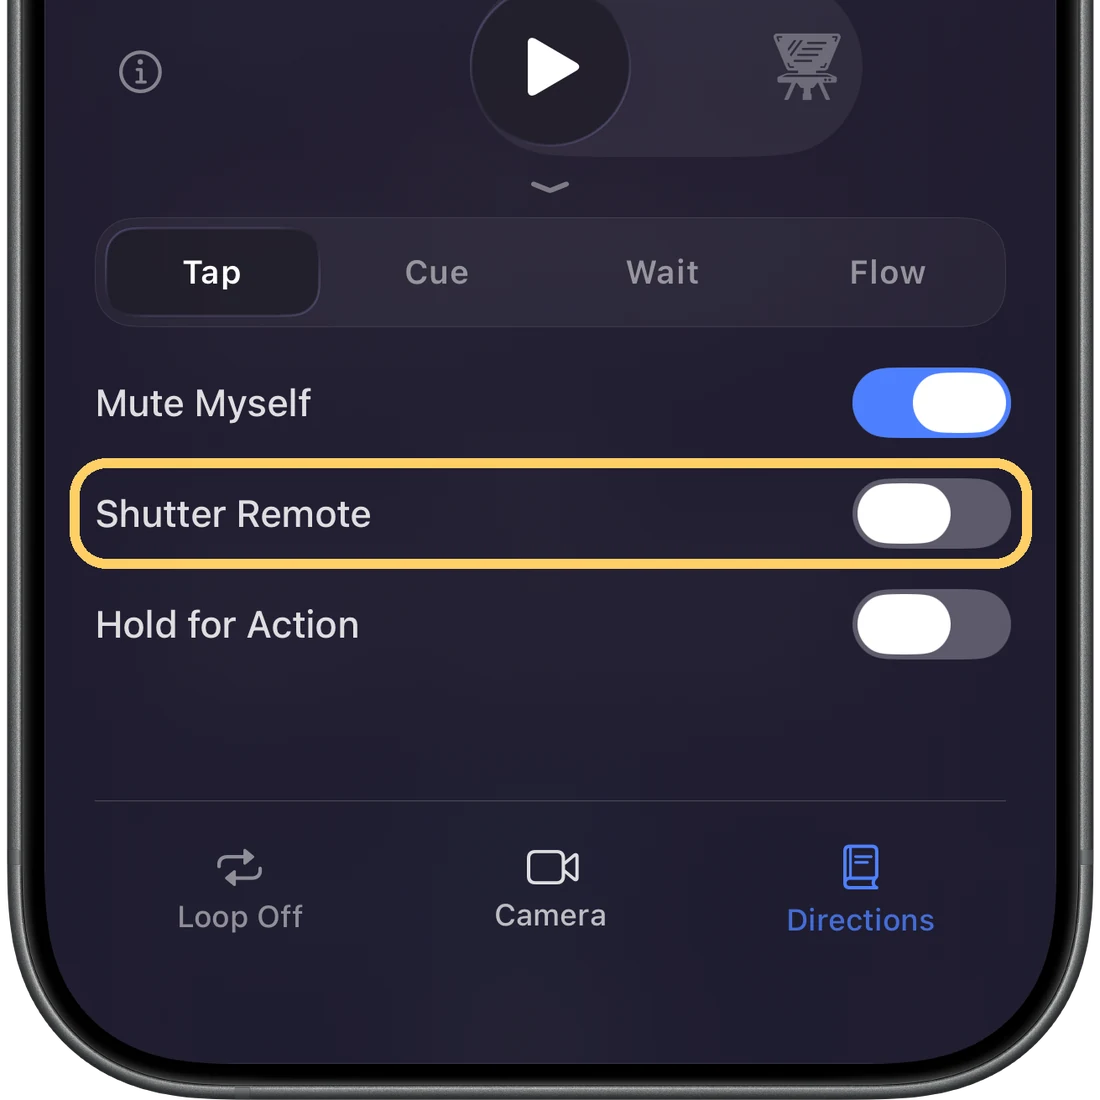
The rehearsal panel, in Tap or Cue.
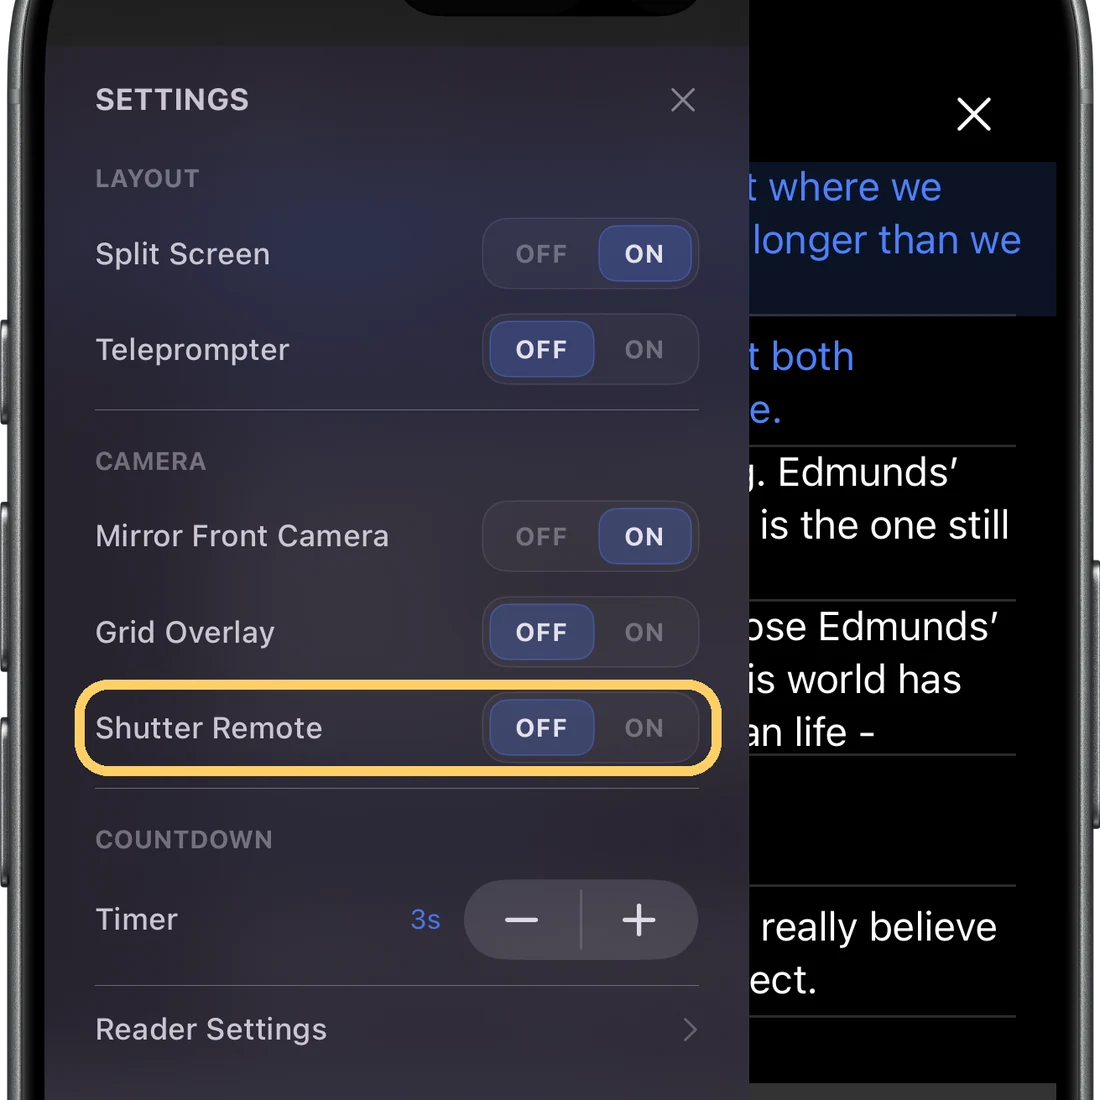
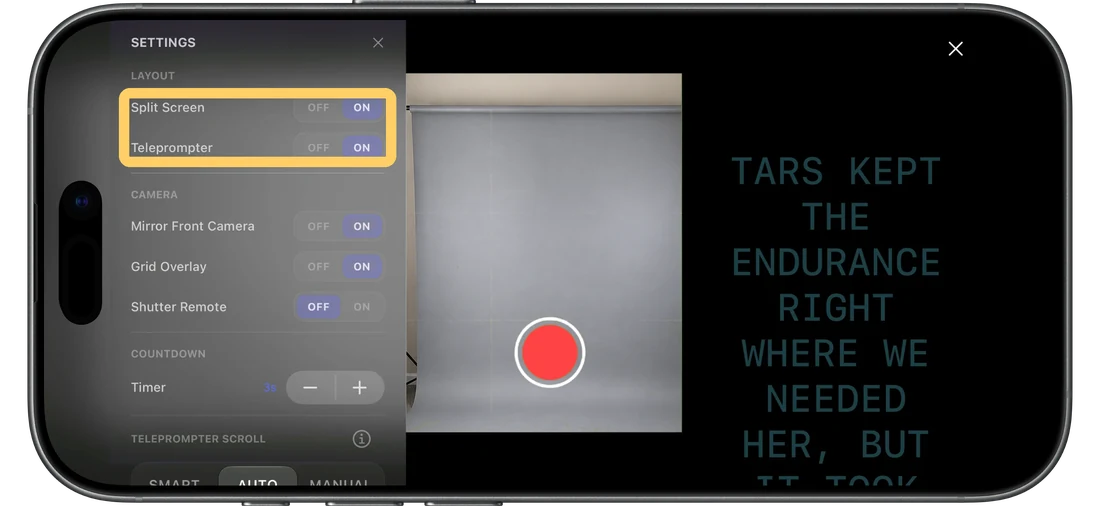
The camera's settings: tap the gear on the camera screen.
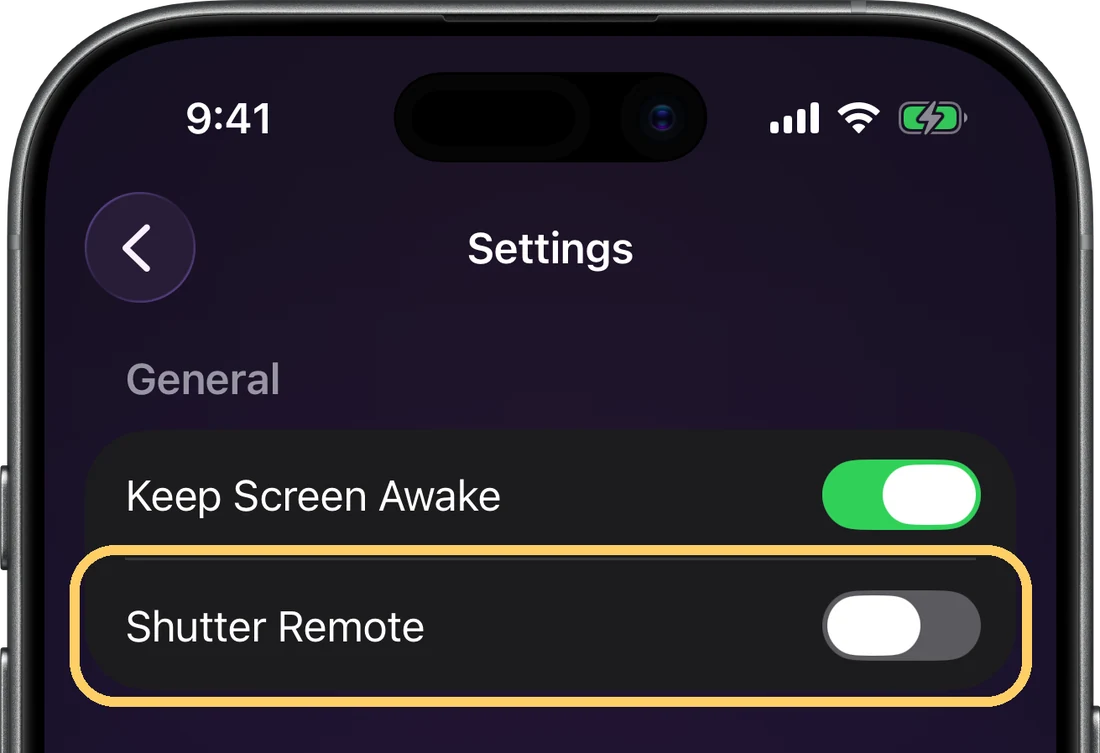
Settings, under General: tap the gear on the home screen.
SideKick 101
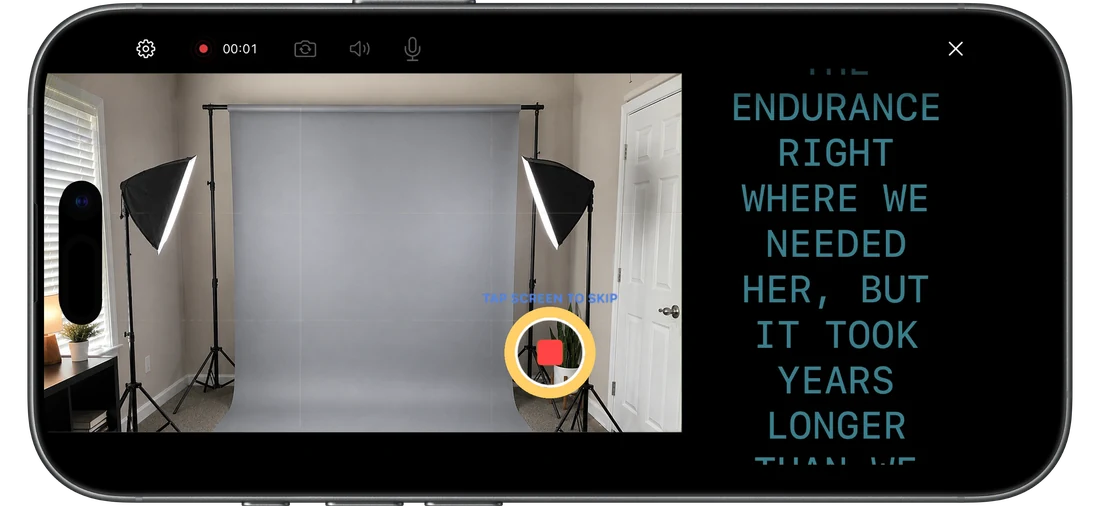
While Shutter Remote is on, your phone's volume buttons skip lines too. On the camera, presses only count once a take is rolling, so a press never starts a take.
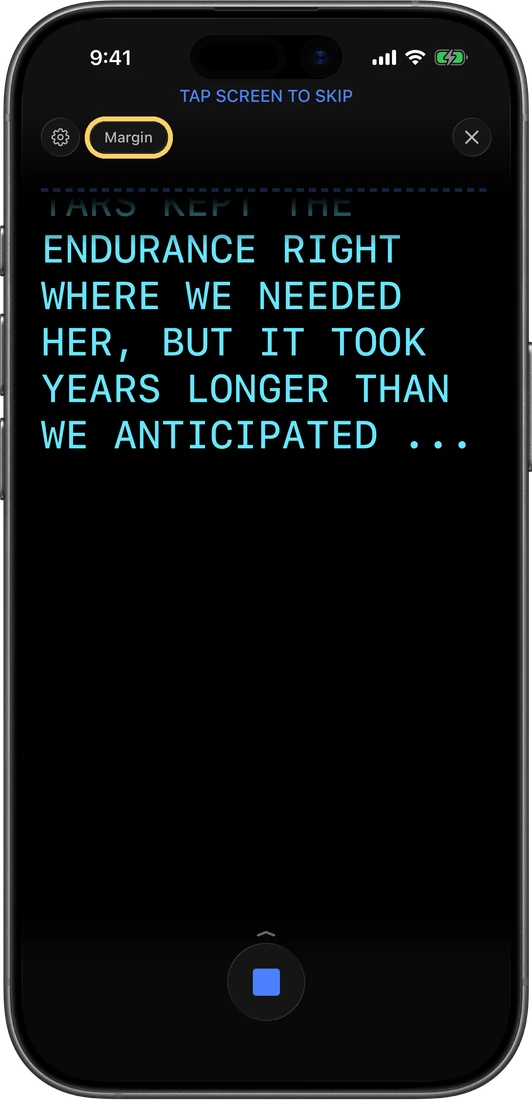
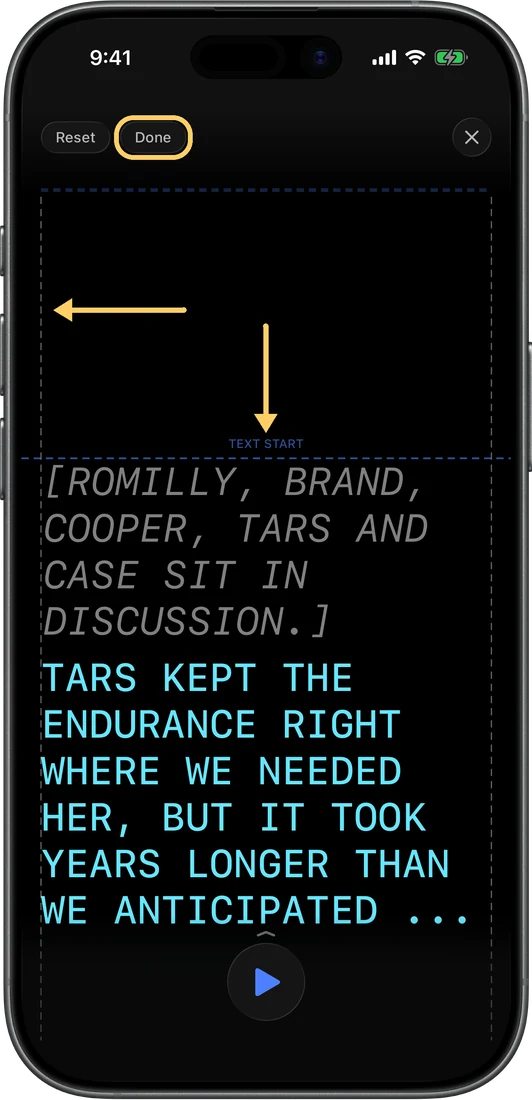
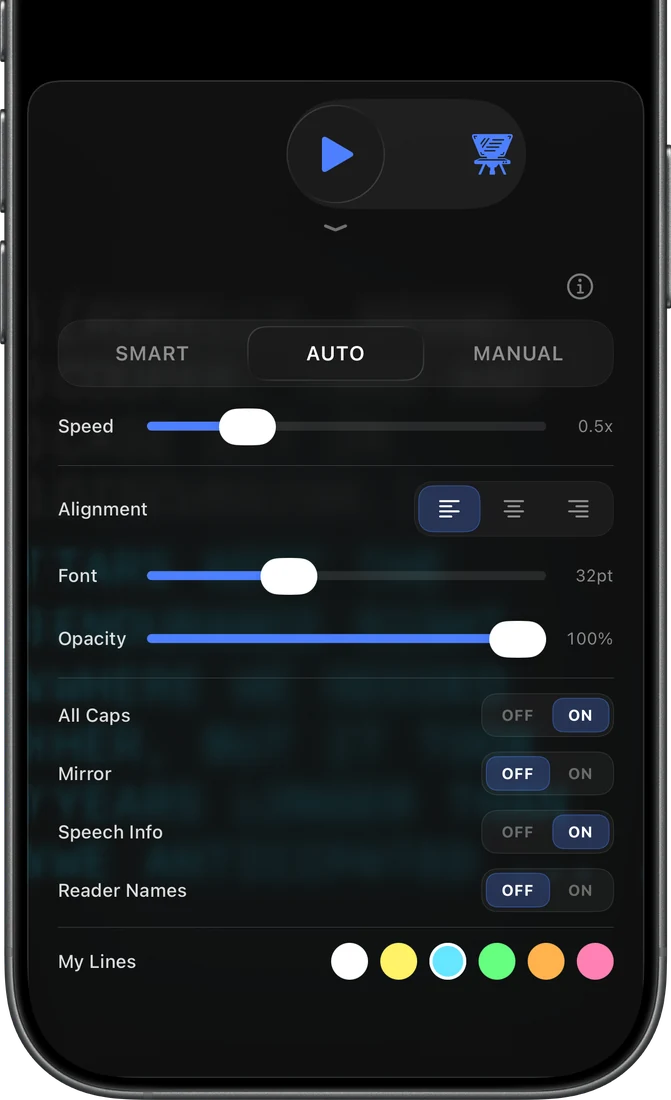
Self-tape
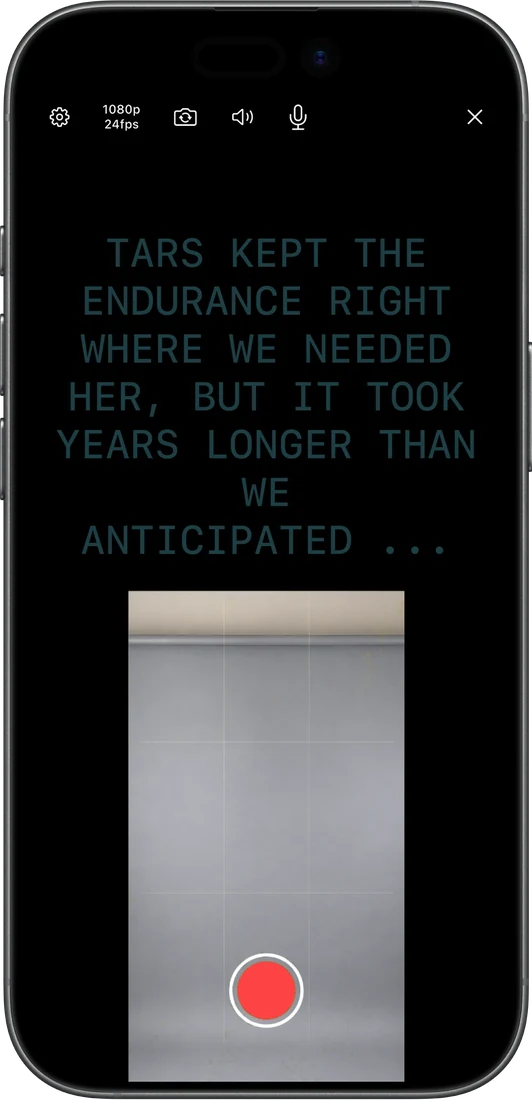
Film your audition while SideKick reads the other characters.
 SideKick 101
On an iPhone older than the iPhone 16, or with a Bluetooth speaker:
- The reader is loud in Save Raw. Your microphone hears it through the speaker. If you plan to use the raw audio without a Bluetooth speaker, lower your phone volume before recording.
- Wait for the reader to finish before you speak. On older iPhones, Improve Audio mutes your microphone under each reader line.
 SideKick 101
If SideKick hears loud background noise, the review shows a note you can dismiss: "Loud background noise detected. Try quieting fans or A/C for best results."
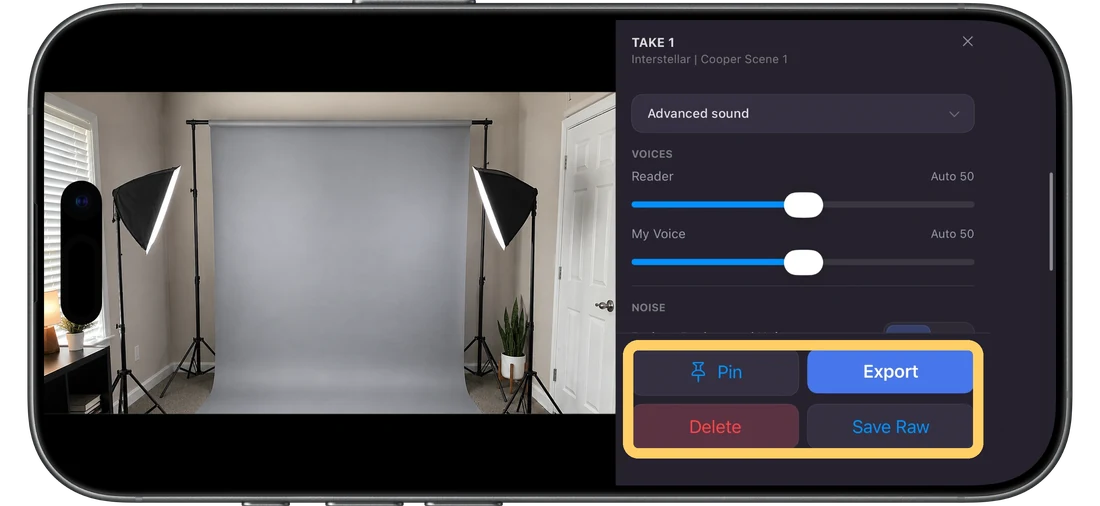
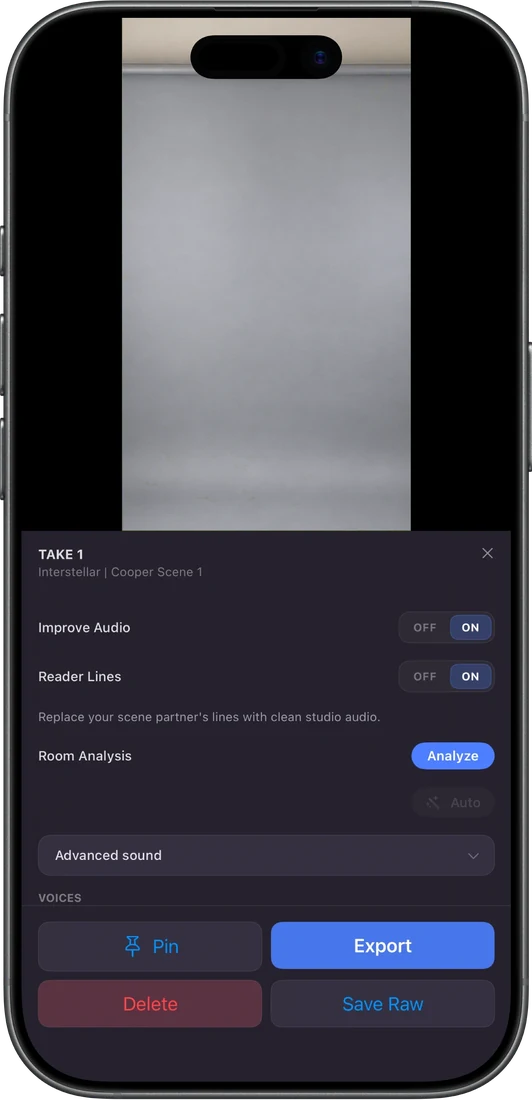
Improve Audio (on by default) cleans up the sound. Under it, Reader Lines lays the clean reader audio in under your scene partner's lines. It appears only when the take can use it.
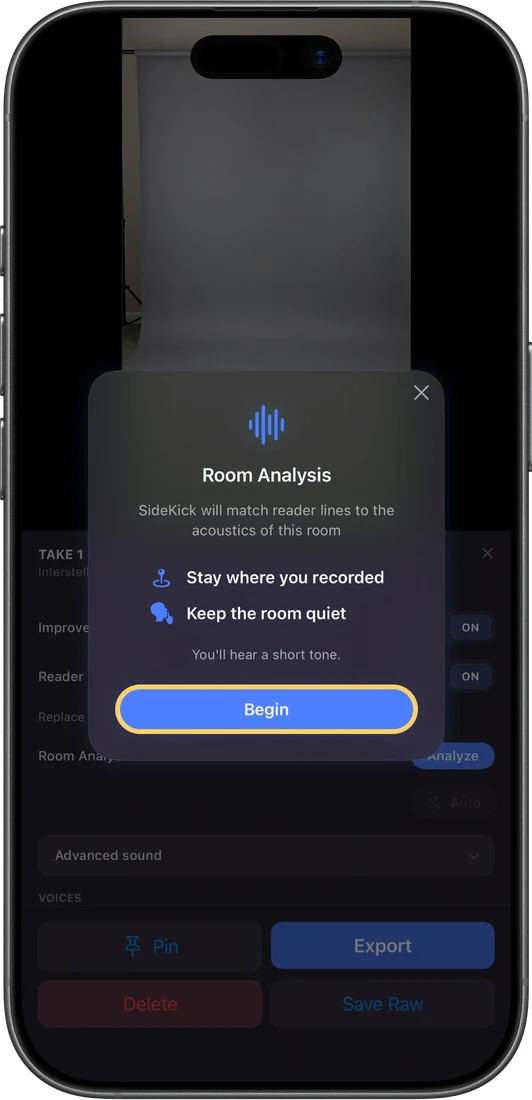
Room Analysis: tap Analyze and stay where you recorded, with the room quiet. SideKick plays a short tone and listens, so the reader lines can get closer to matching the acoustics of your room. Then Auto applies a suggested audio mix. Auto stays locked until you've run an analysis.
Pin keeps the take in the app. Export saves the improved version to Photos, or the raw take if Improve Audio is off. Save Raw saves the take as recorded. Delete removes it.
Close with X on a take that isn't pinned or saved to Photos, and SideKick asks "Discard this take?" first.
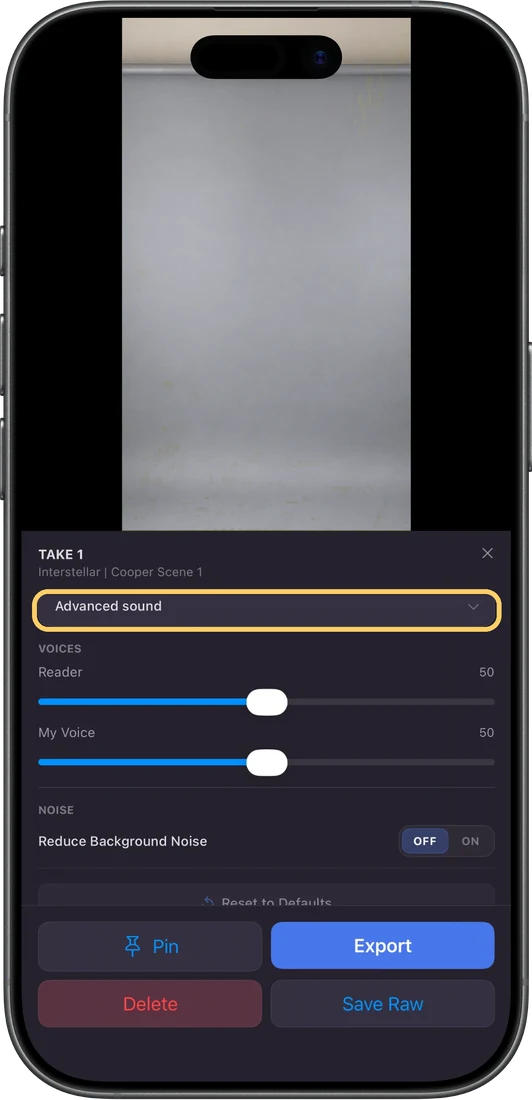
Advanced sound has Reader and My Voice faders (Reader appears only when a clean reader is laid in), Reduce Background Noise with a Strength setting, and Reset to Defaults. Match Room Tone loops a quiet moment from your own take behind the reader's lines. It is off by default and appears only when it can do something.
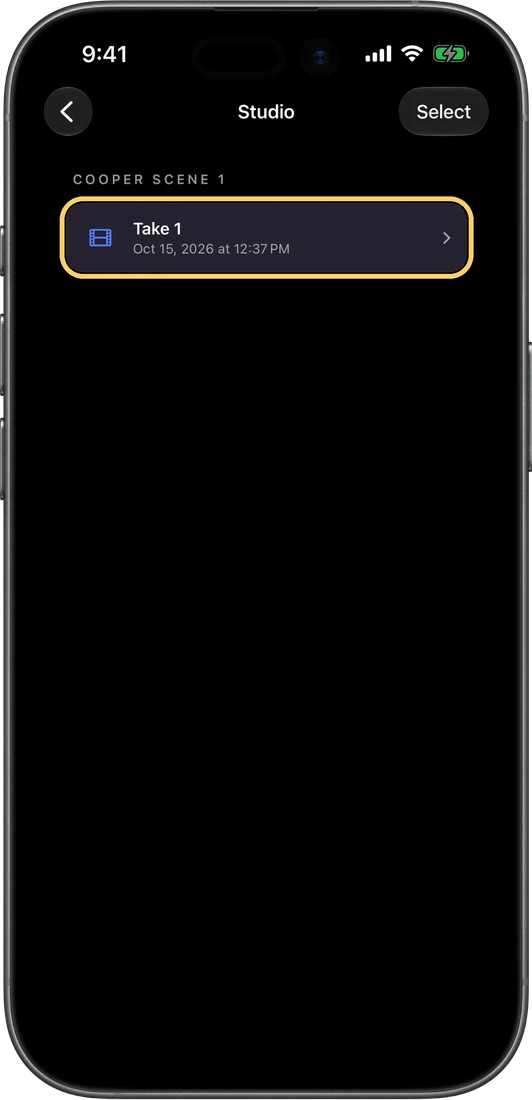
Studio appears once you've pinned a take. Tap Select to delete several, swipe to delete one, or press and hold to rename. A scene's takes are also under Takes in the scene's ⋯ menu.
Saving to Photos asks for permission to add to Photos the first time.
Speakers & microphones
Two buttons in camera mode decide where the reader plays and which microphone records you.
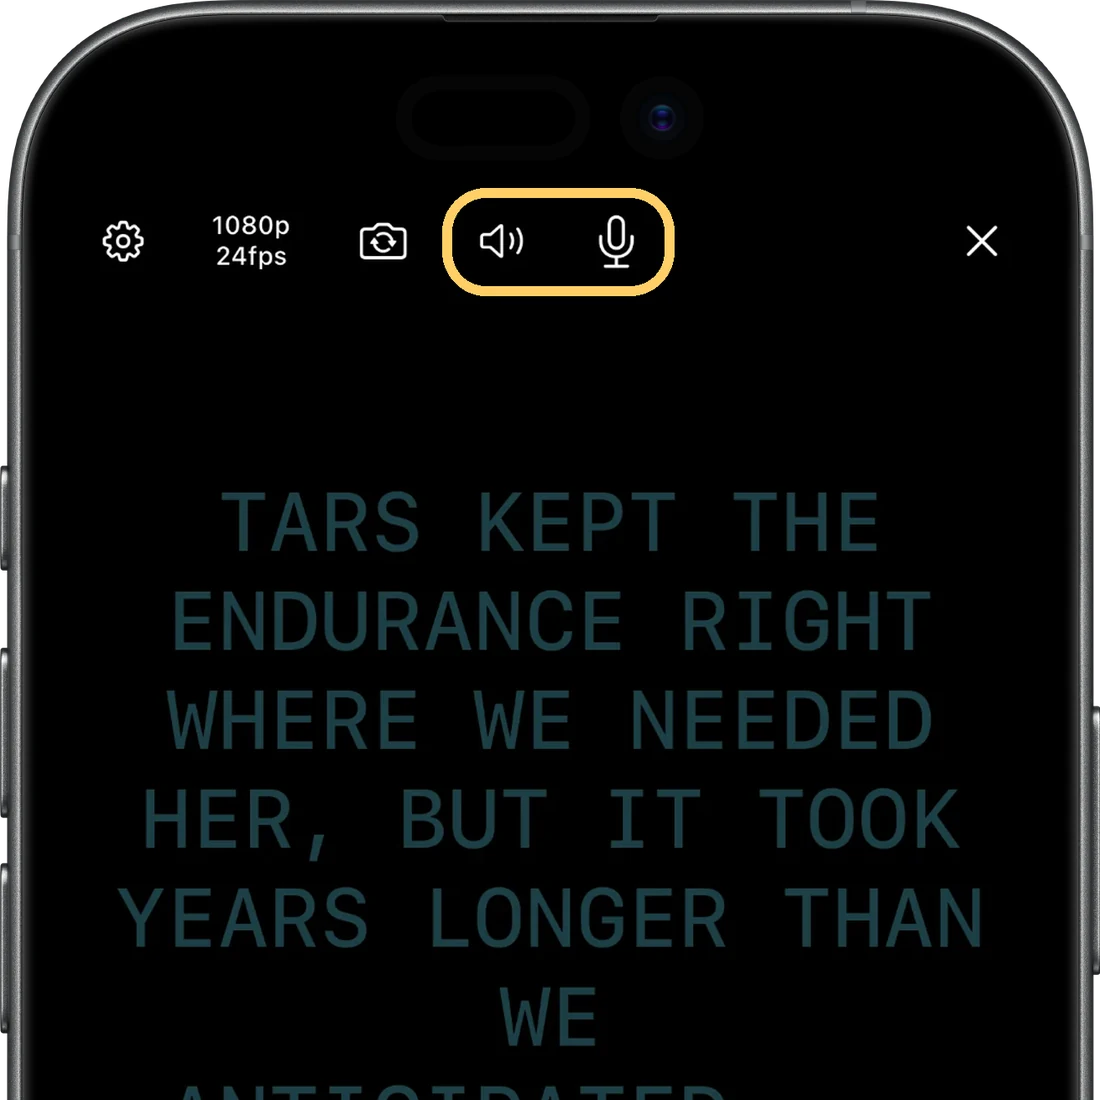
Reader speaker: the phone speaker or a Bluetooth speaker.
With a Bluetooth speaker, the reader stays in the raw recording, so Reader Lines and the Reader fader don't appear in the review. Reduce Background Noise and the My Voice volume slider still work.
USB microphone (like DJI Mic or Rode Go): plug it in or connect its receiver. Open the camera, tap the speaker button and choose the phone's speaker, so the reader doesn't play through the microphone's receiver. Then tap the microphone button and choose your microphone. SideKick never switches either for you, and both buttons are greyed out while you record.
The microphone button needs iOS 26 or later.
Edit lines, voices & audio
Once a scene is built, every line and every voice can be reworked without re-importing.
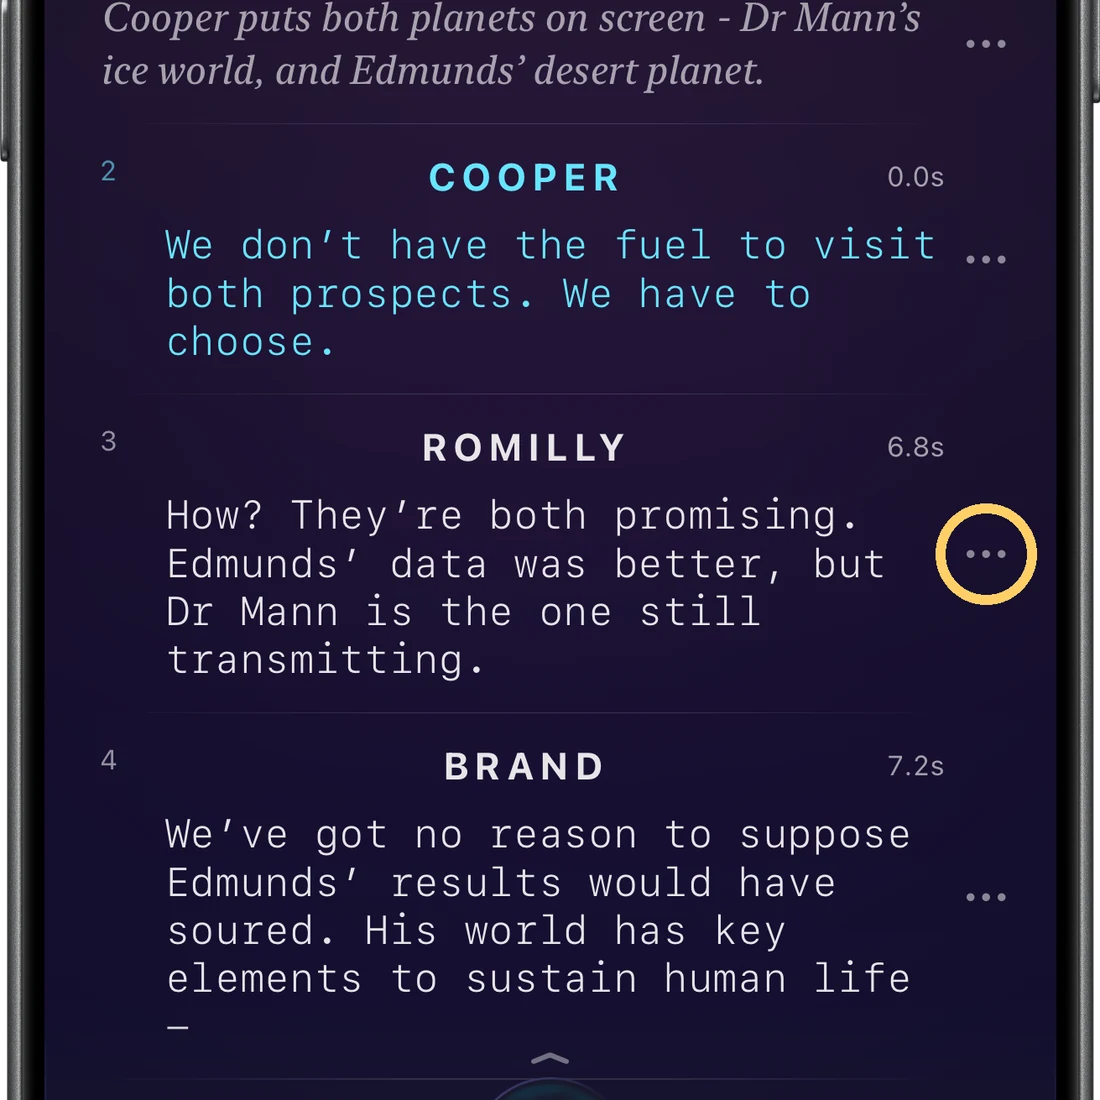
Tap the ⋯ on any line to open its editor.
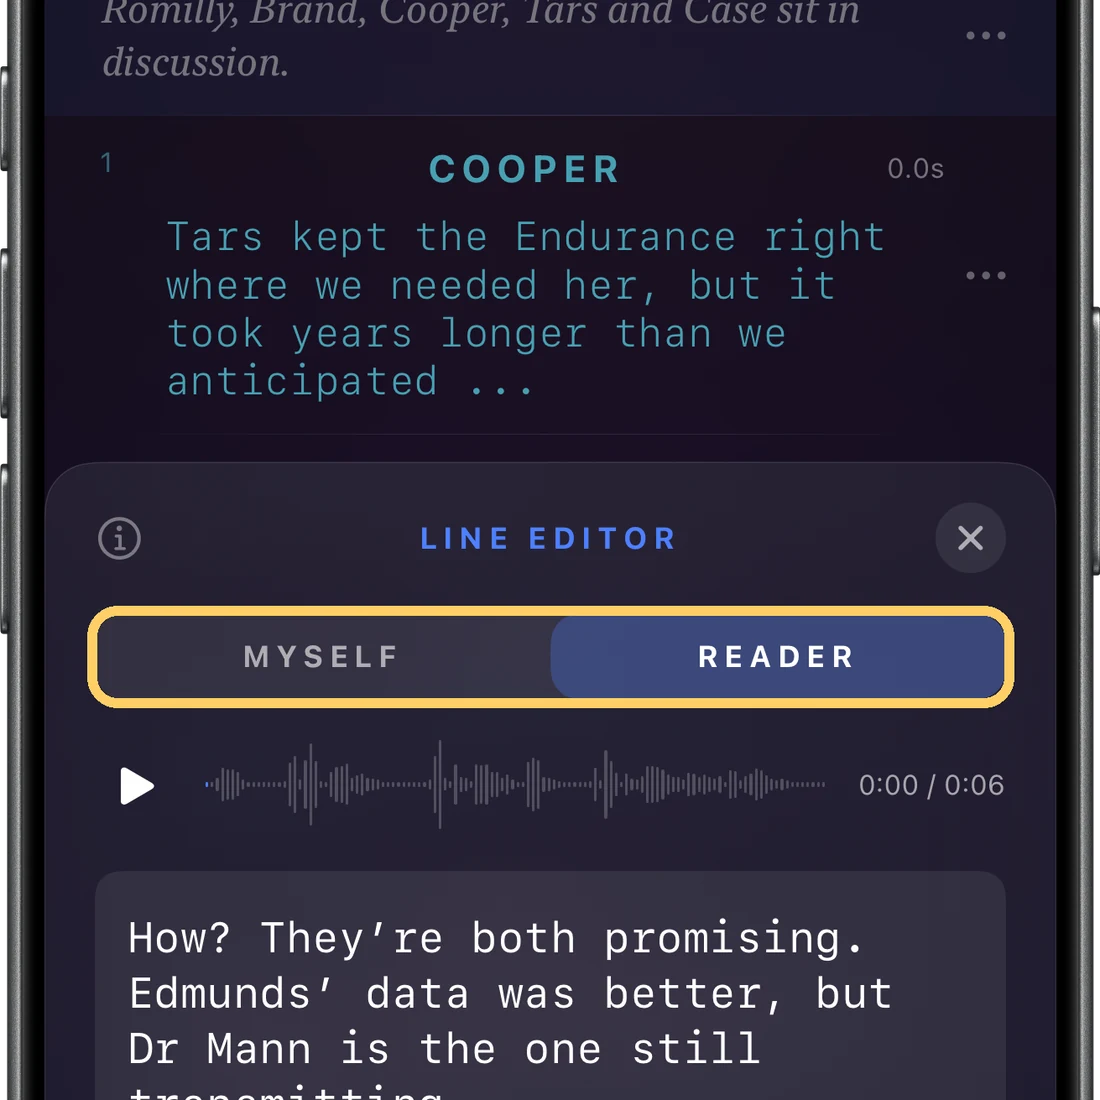
Myself / Reader: flip who owns the line.
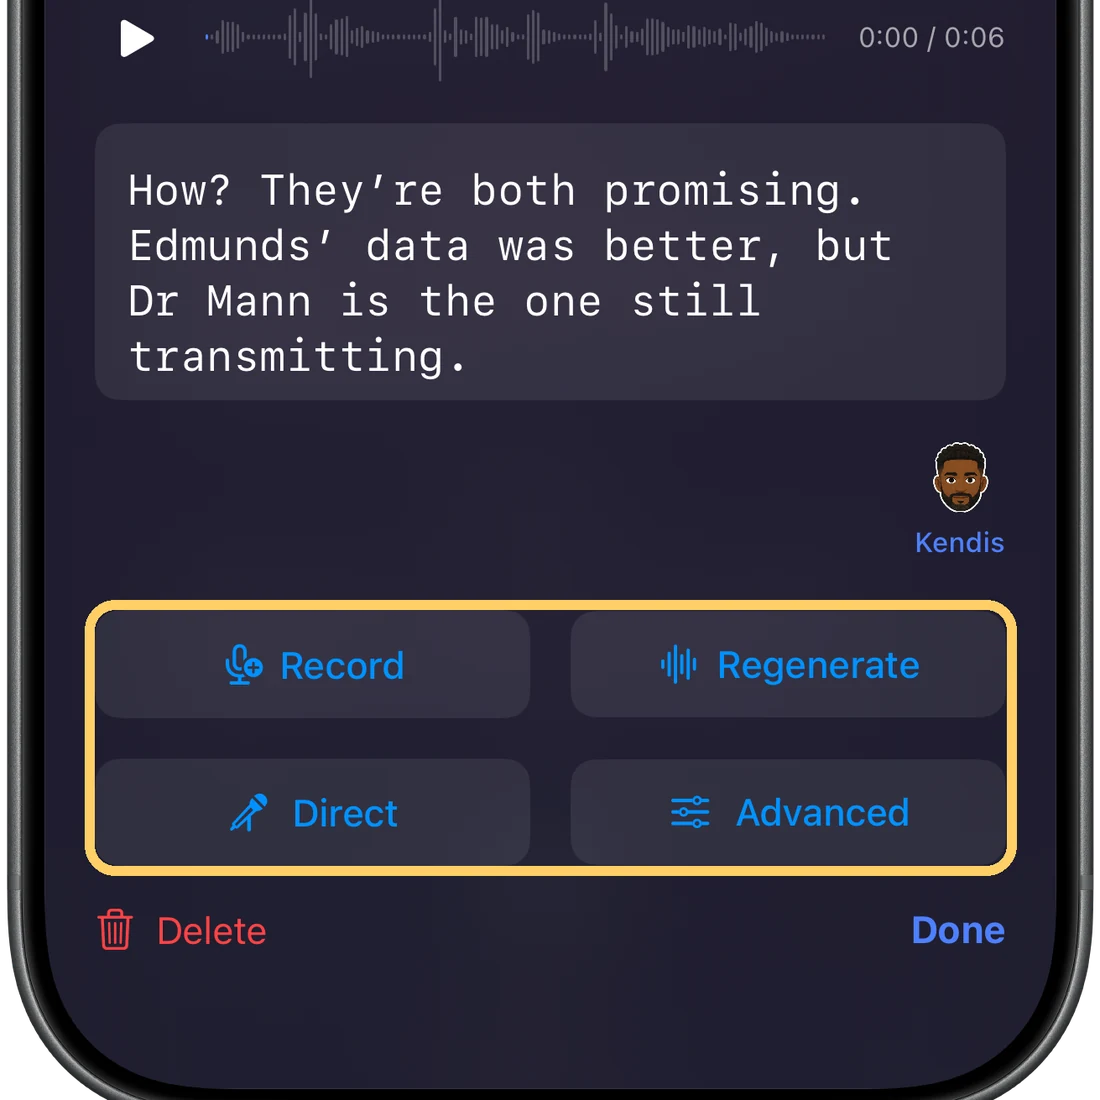
Give a line a new voice the same three ways as in step three: Record, Generate and Direct. Once a line has the Persona's audio, Generate becomes Regenerate, for a new read.
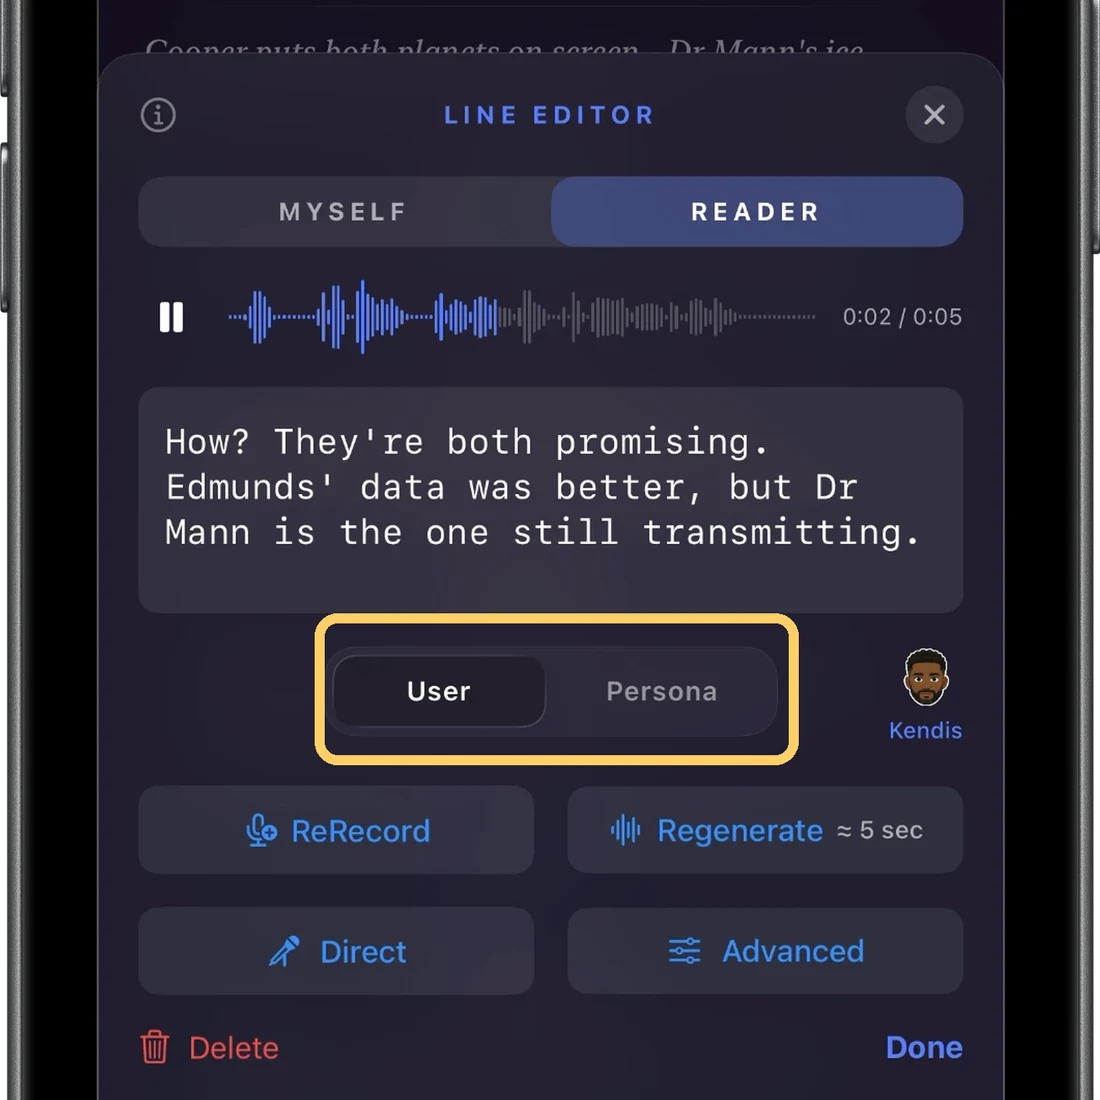
User / Persona: a line can hold both your recording and the Persona's. Toggle between them whenever both exist.
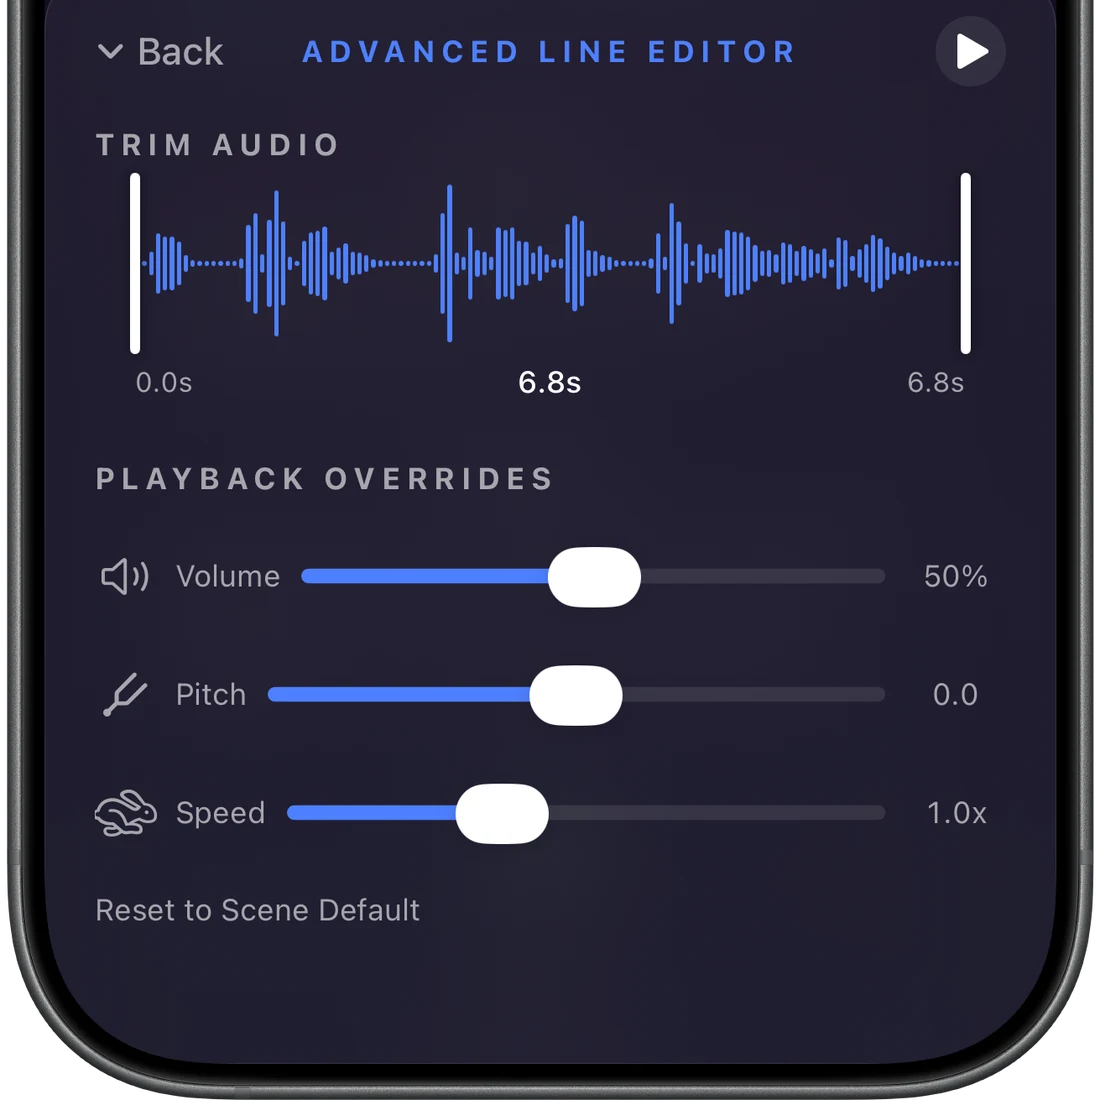
Advanced: trim the clip and set its volume, pitch, and speed. The button shows on any line that has audio, and swiping up in the line editor opens the same page.
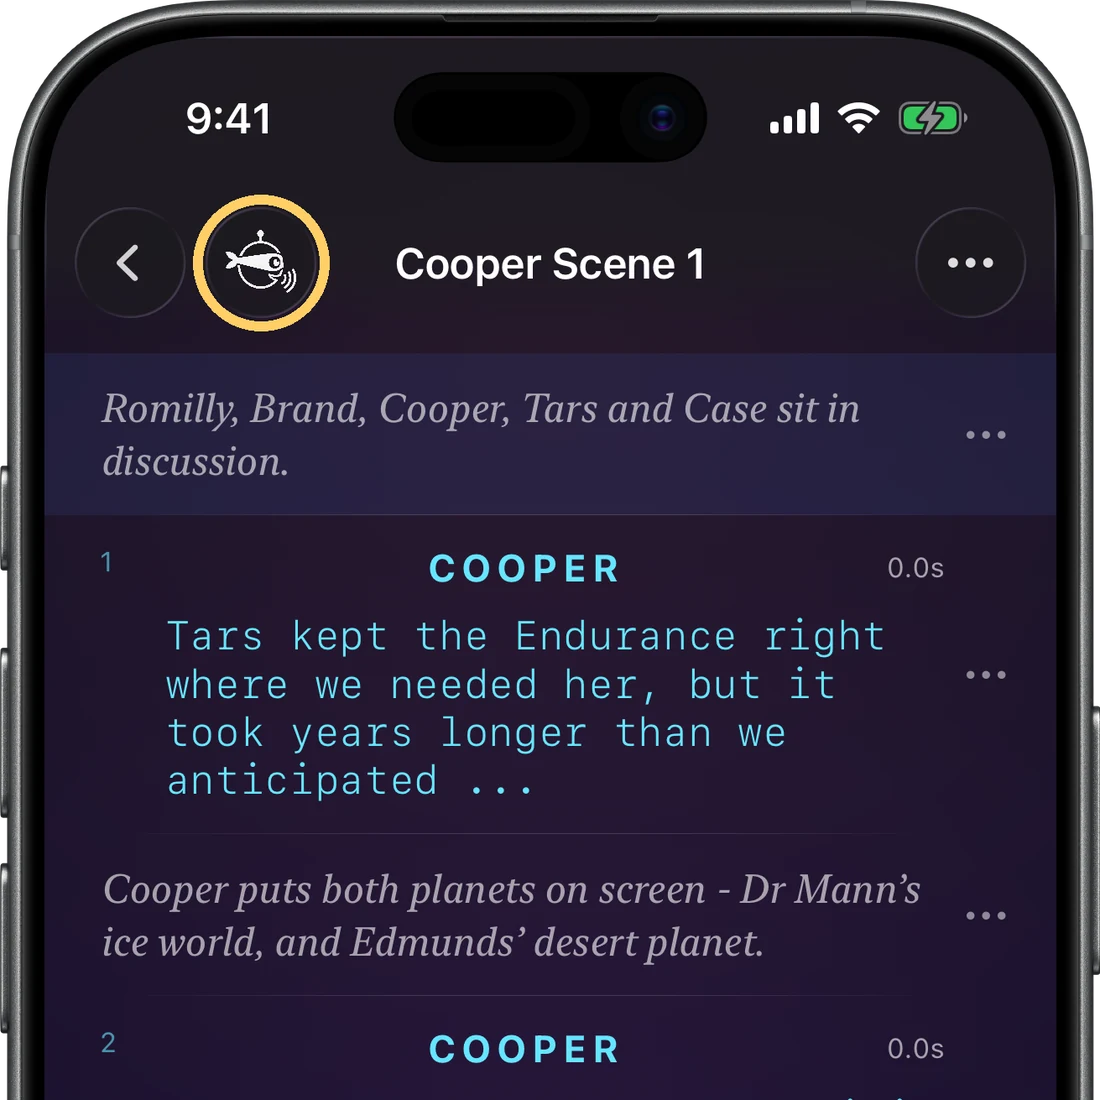
Tap the robot button at the top to open whole-scene controls. It opens two tabs, Cast and Reader, that affect every line at once. The button is hidden while a rehearsal is running.
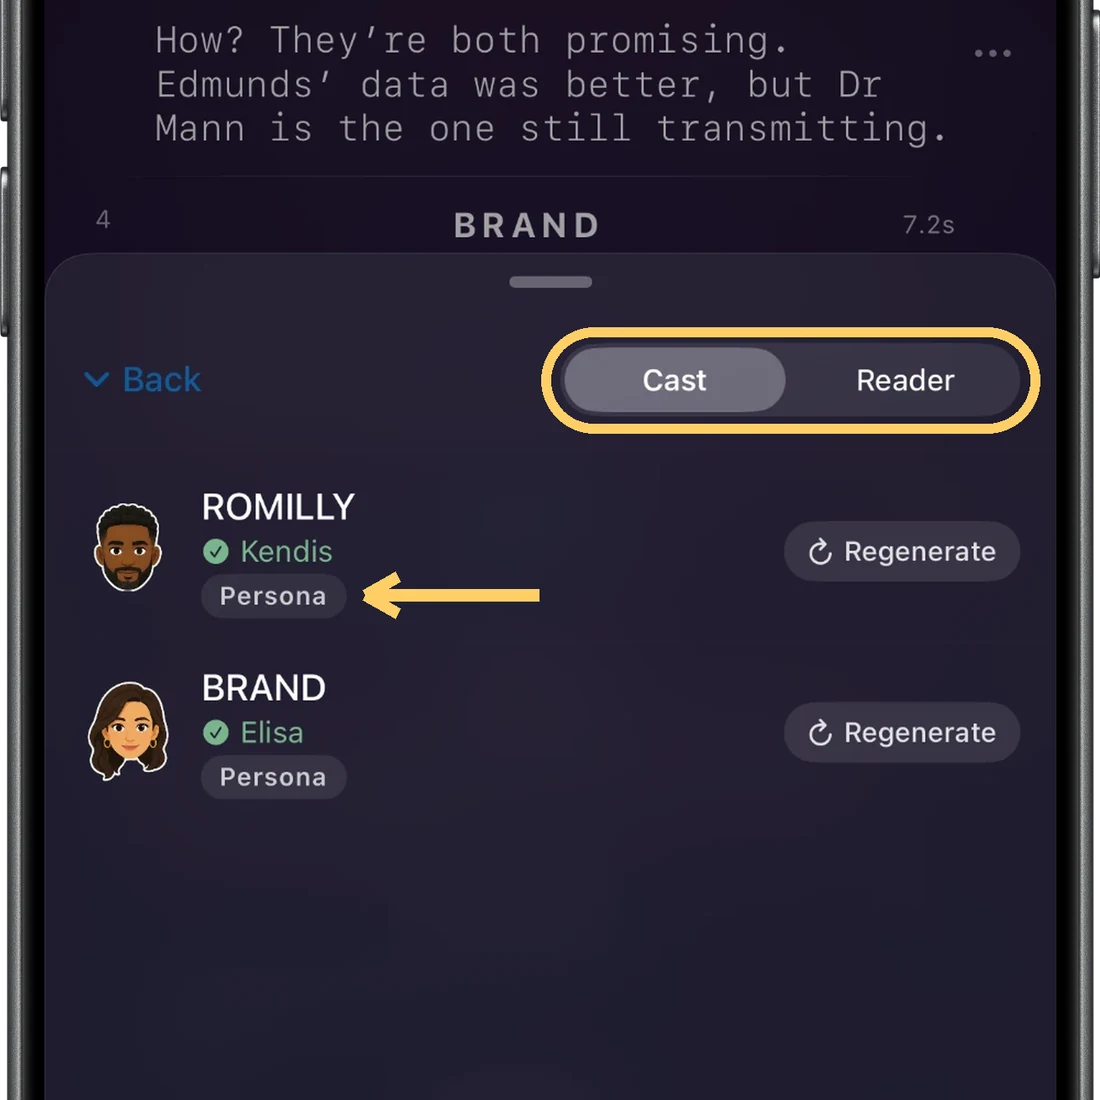
Cast: recast a character, or regenerate all of their lines at once. The small label under each character, such as Persona, User, or Mixed, shows whose audio their lines play.
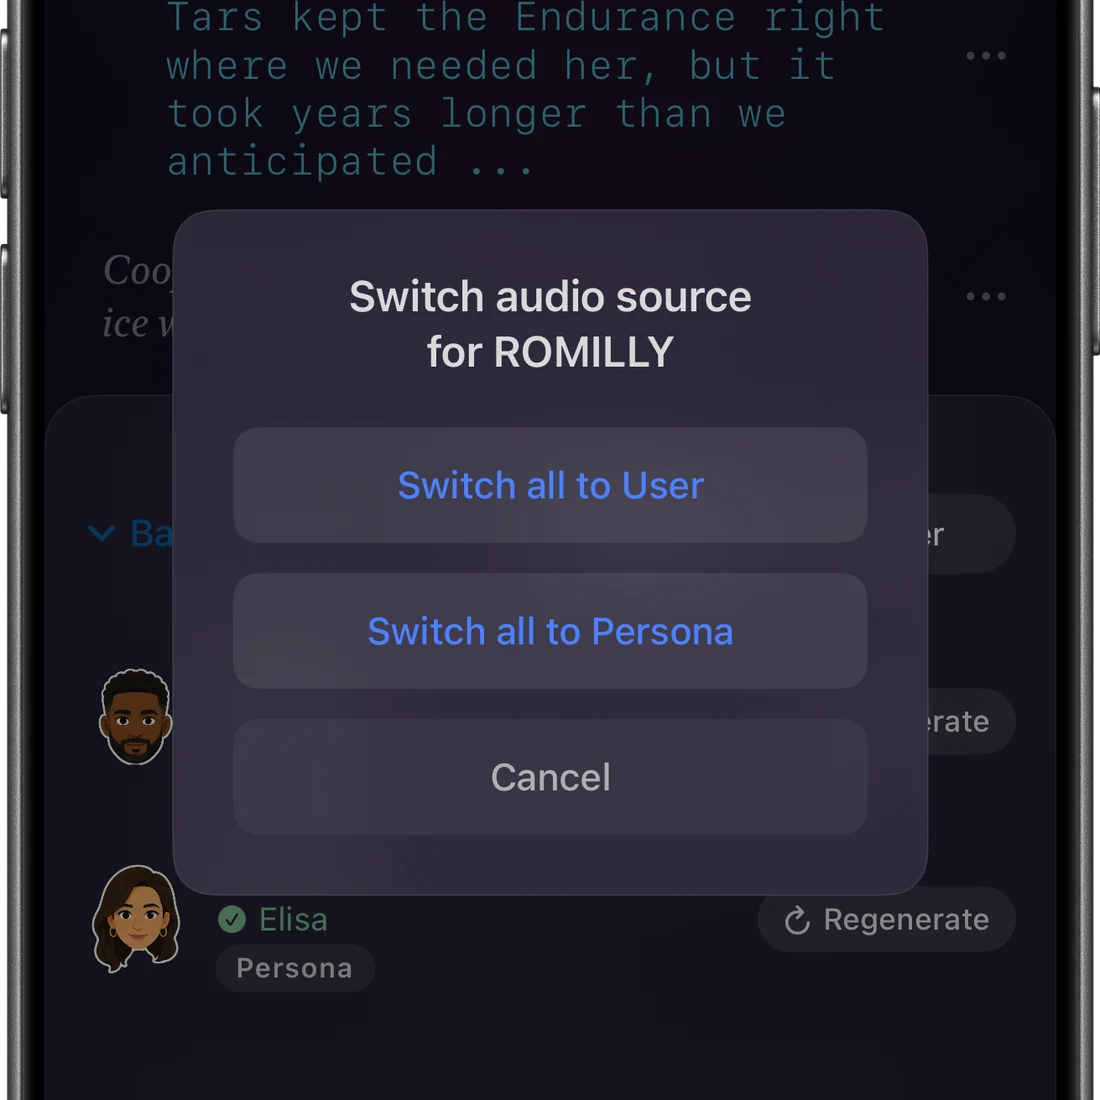
Tap a character's label to switch all of their lines at once: Switch all to User plays your recordings, Switch all to Persona plays the Persona's.
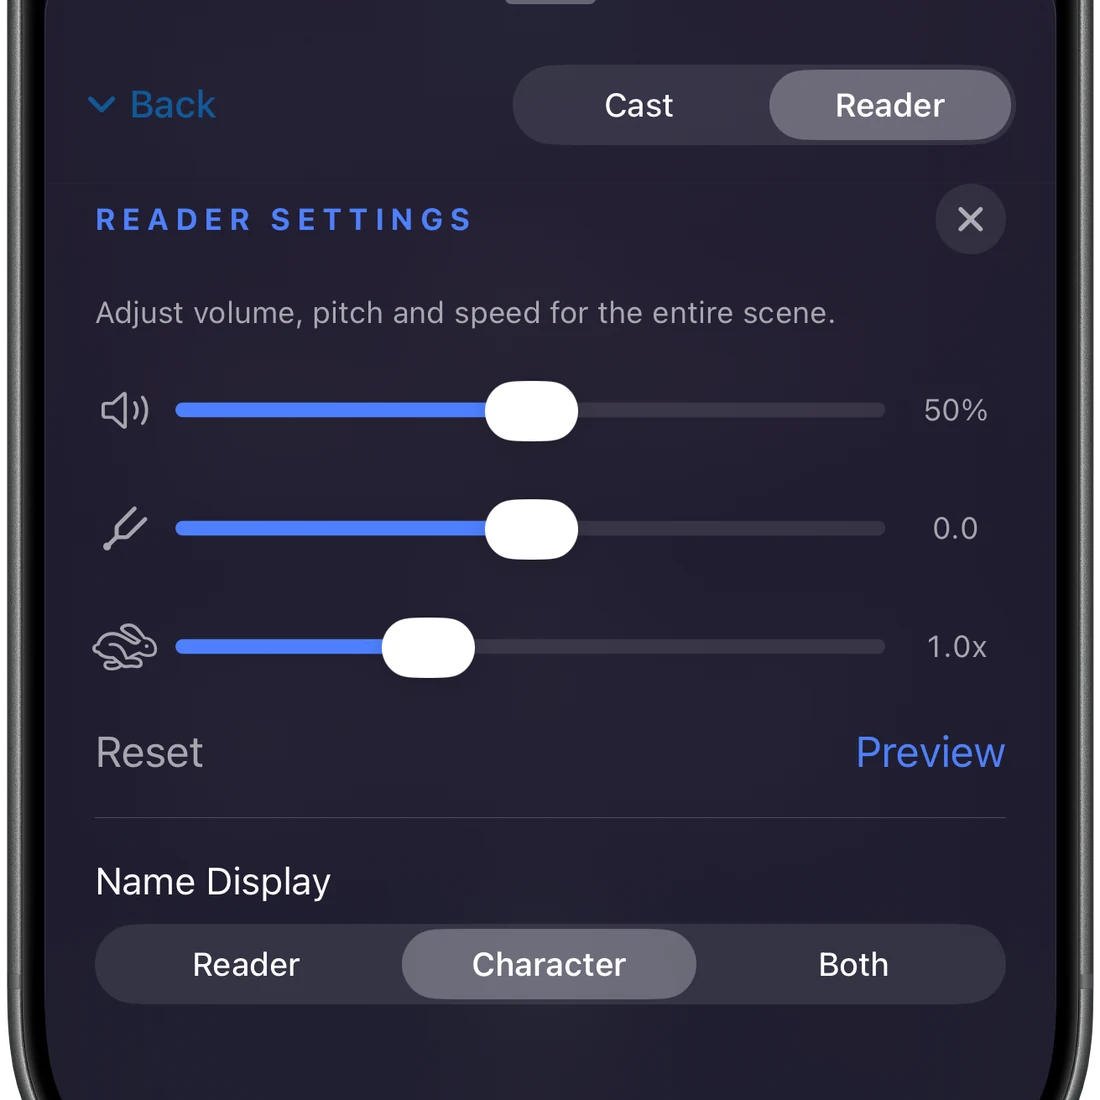
Reader: change volume, pitch, and speed for every reader line at once, plus how character names are shown.
Watch & share
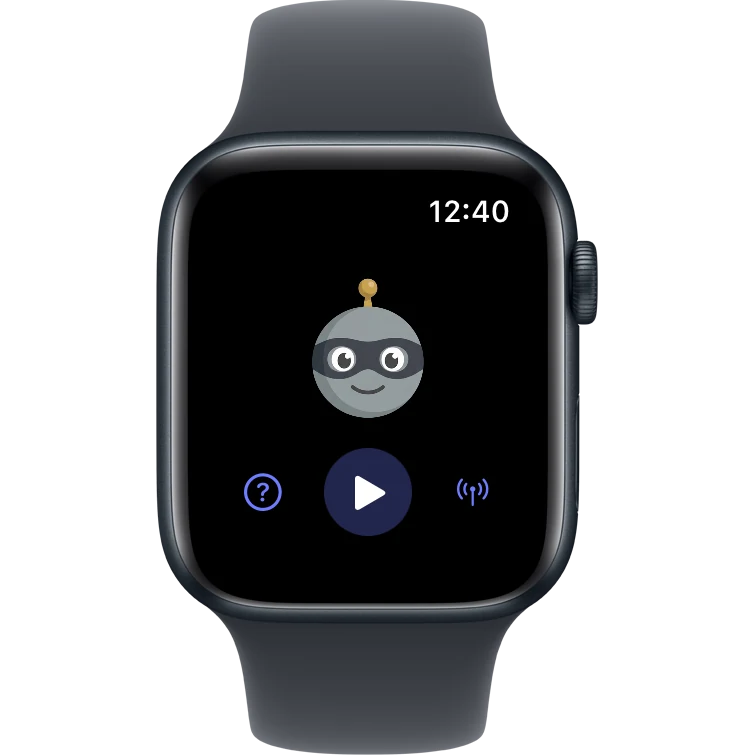
Tap to advance, swipe down to play or stop, swipe up to start over.
Swipe up gives a double vibration so a restart is unmistakable. The crown scrolls the prompter. While the phone's camera is open, the play button becomes Record and Stop. The antenna icon lights up only when a scene is open on the phone.
SideKick 101
Turn off Wrist Detection and you can hold the watch in your hand as a remote, instead of wearing it, while you self-tape. On the watch: Settings → Passcode → Wrist Detection.
Send a scene to another SideKick user as a .sidekick file.
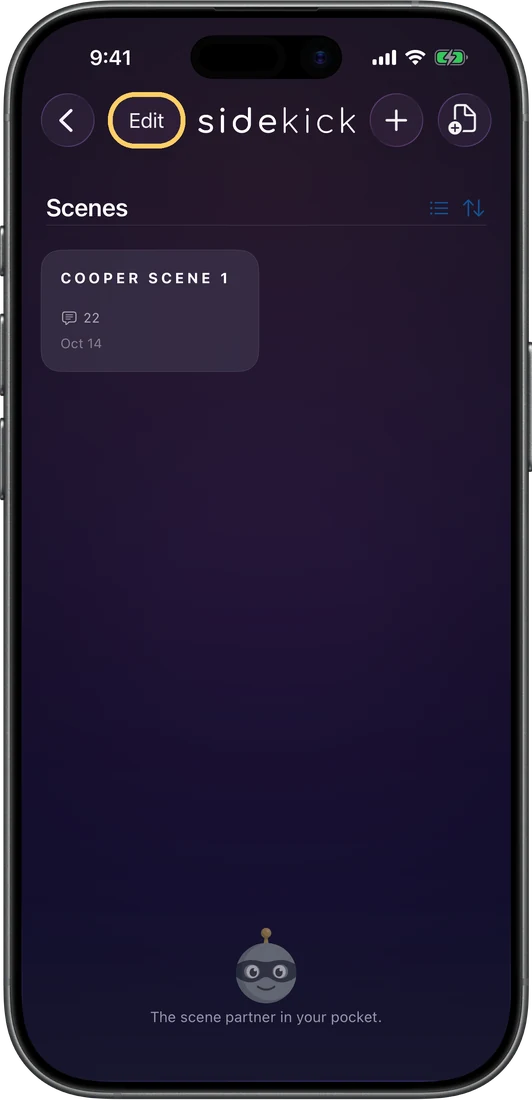
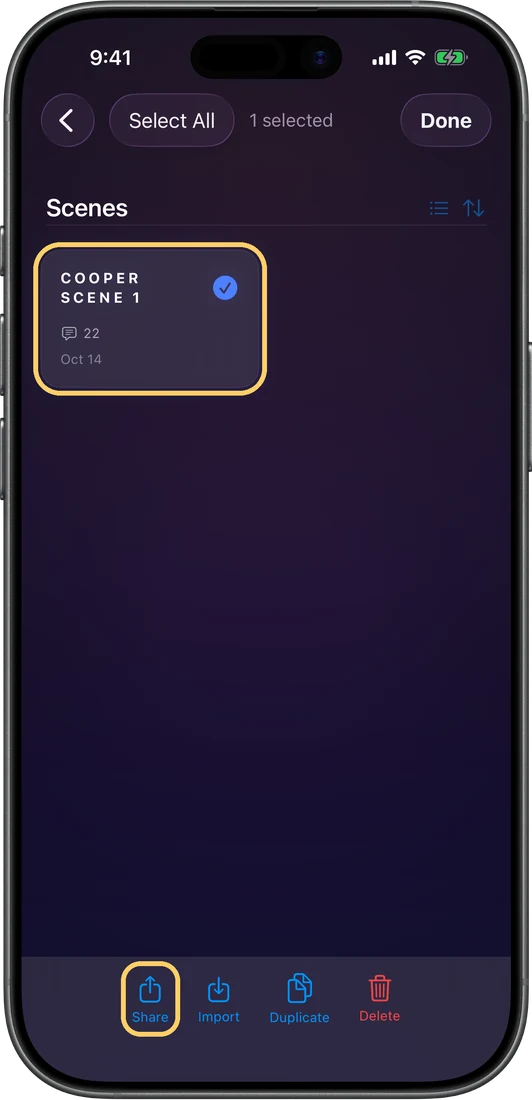
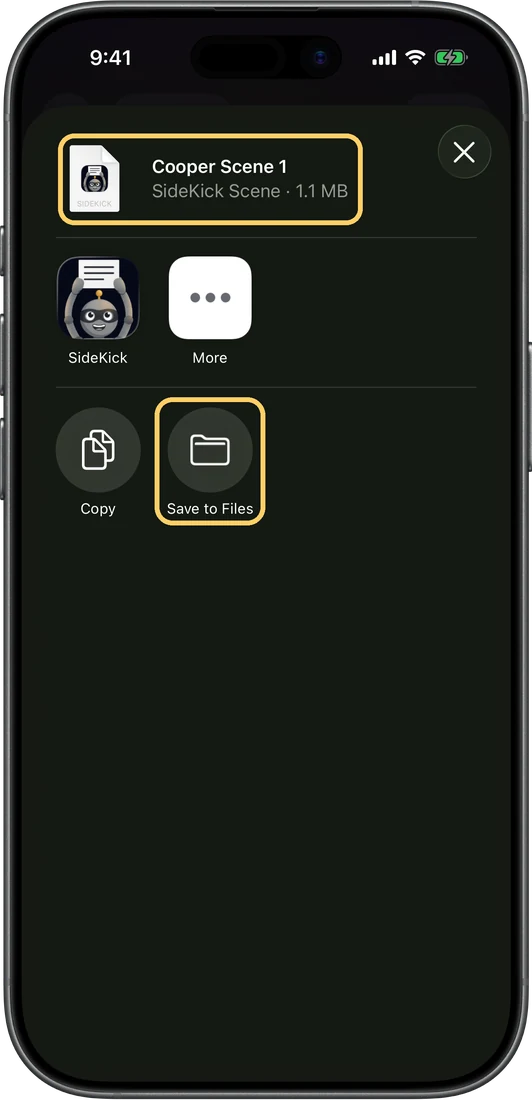 SideKick 101
The file carries the lines, cast, reader settings, and both your recordings and the Persona's. Self-tape videos are not included. Import, in the same bar, adds a scene someone shared with you.
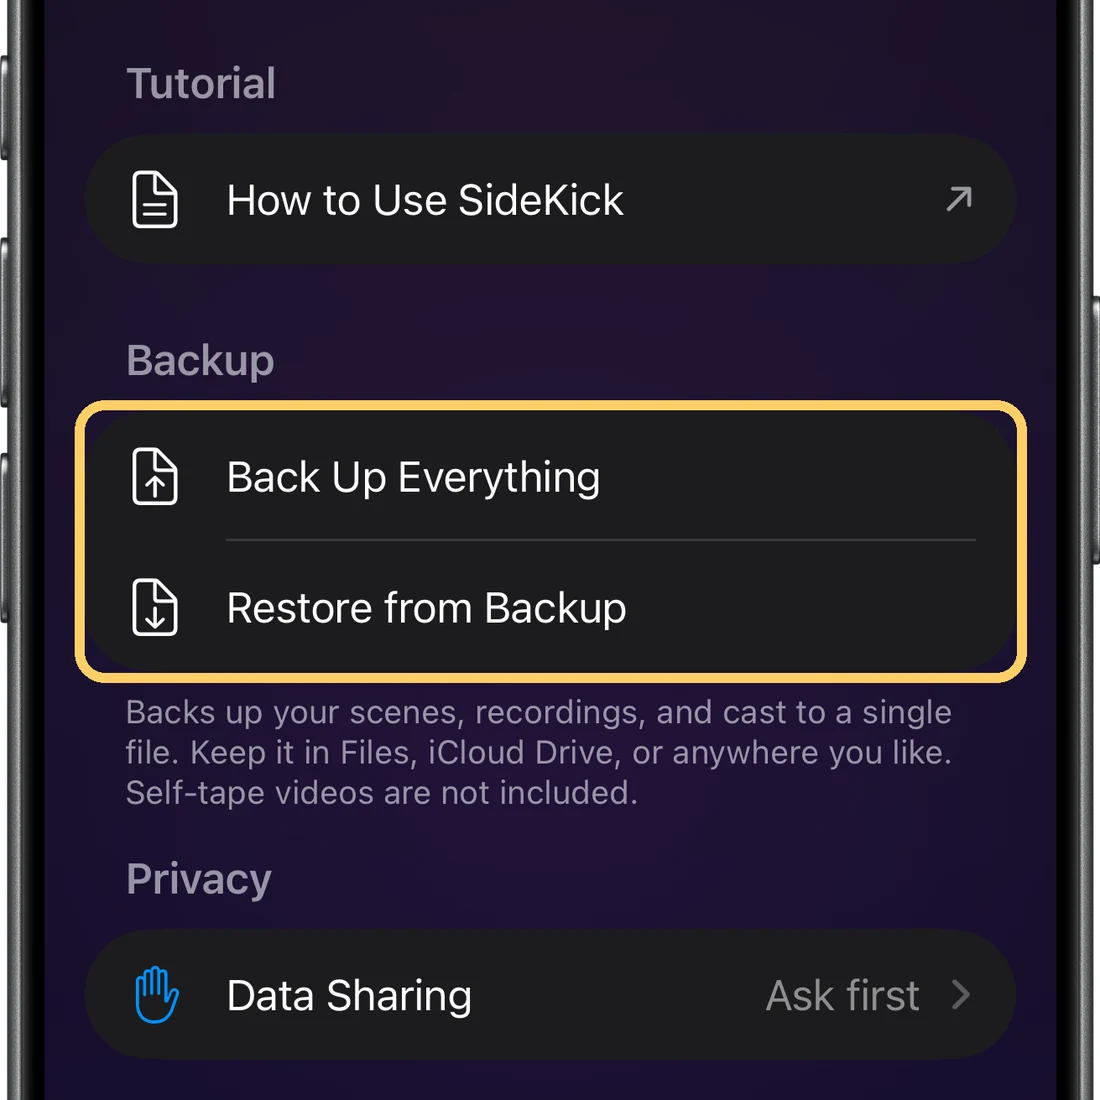
Keep the backup file in Files, iCloud Drive, or anywhere you like.
Manual Scene Import
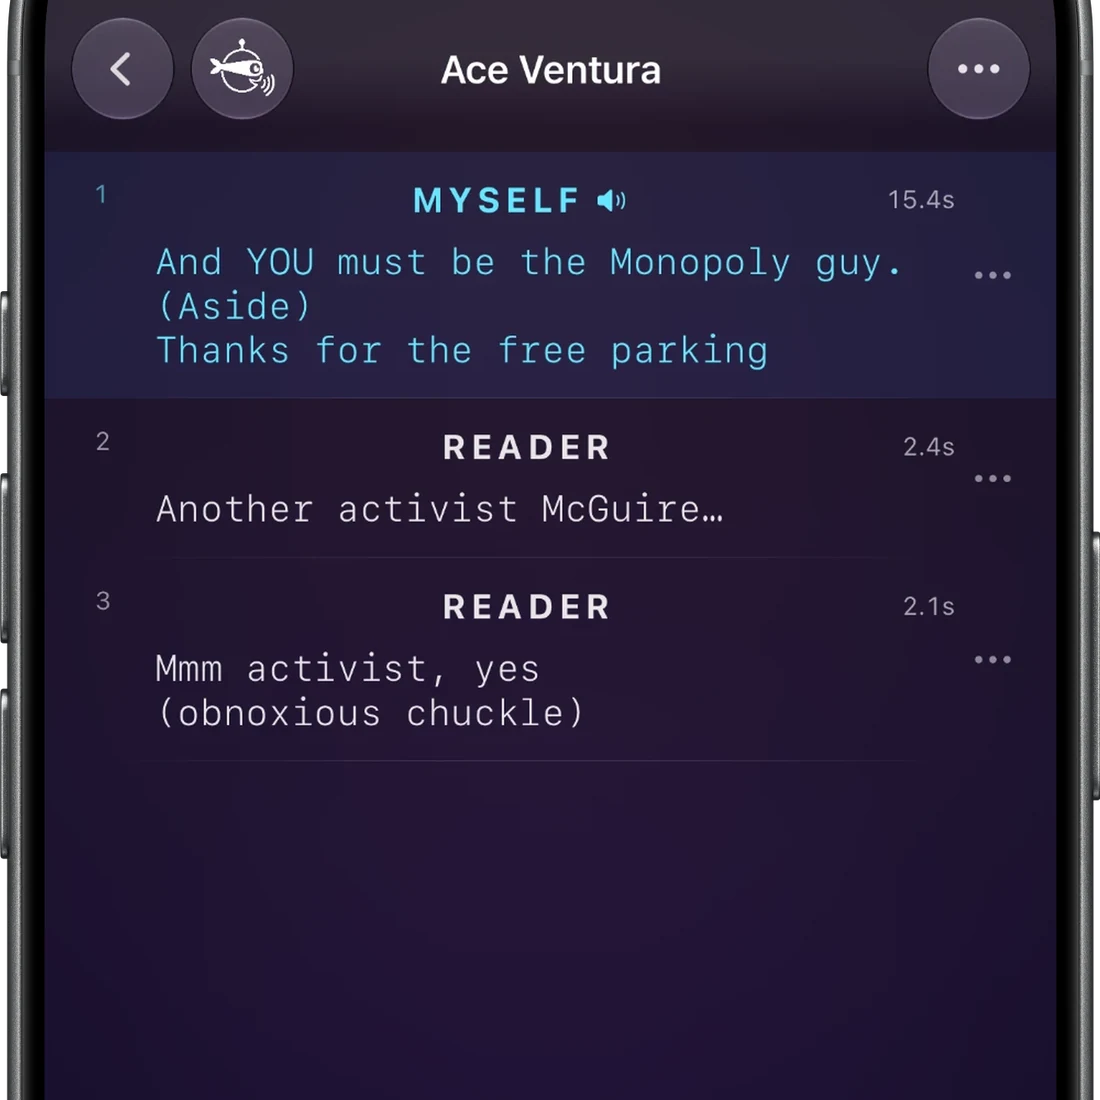
No PDF? Build a scene line by line. Speak each line, tag it as yours or the reader's, and SideKick assembles the scene as you go.
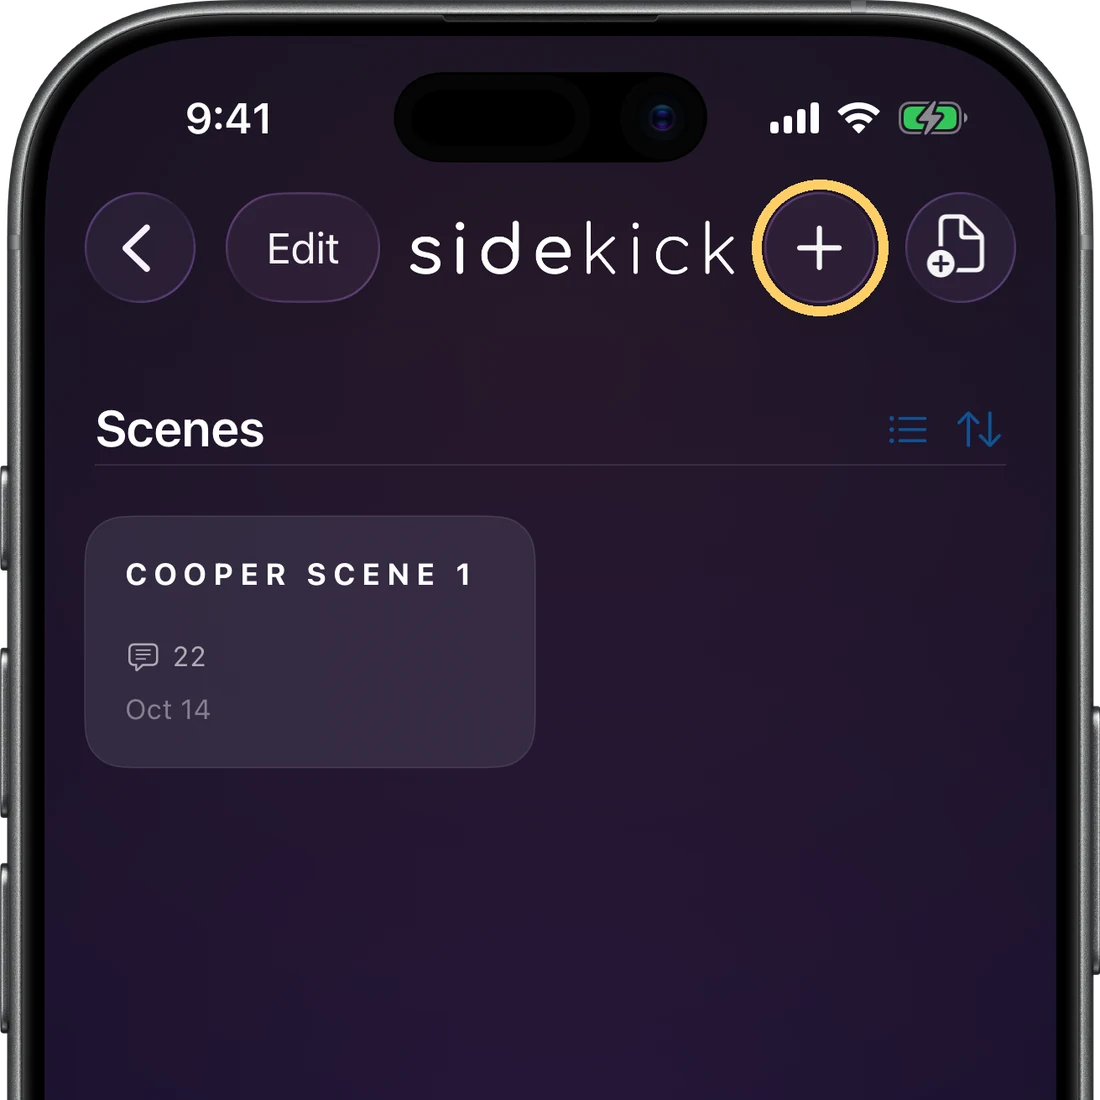
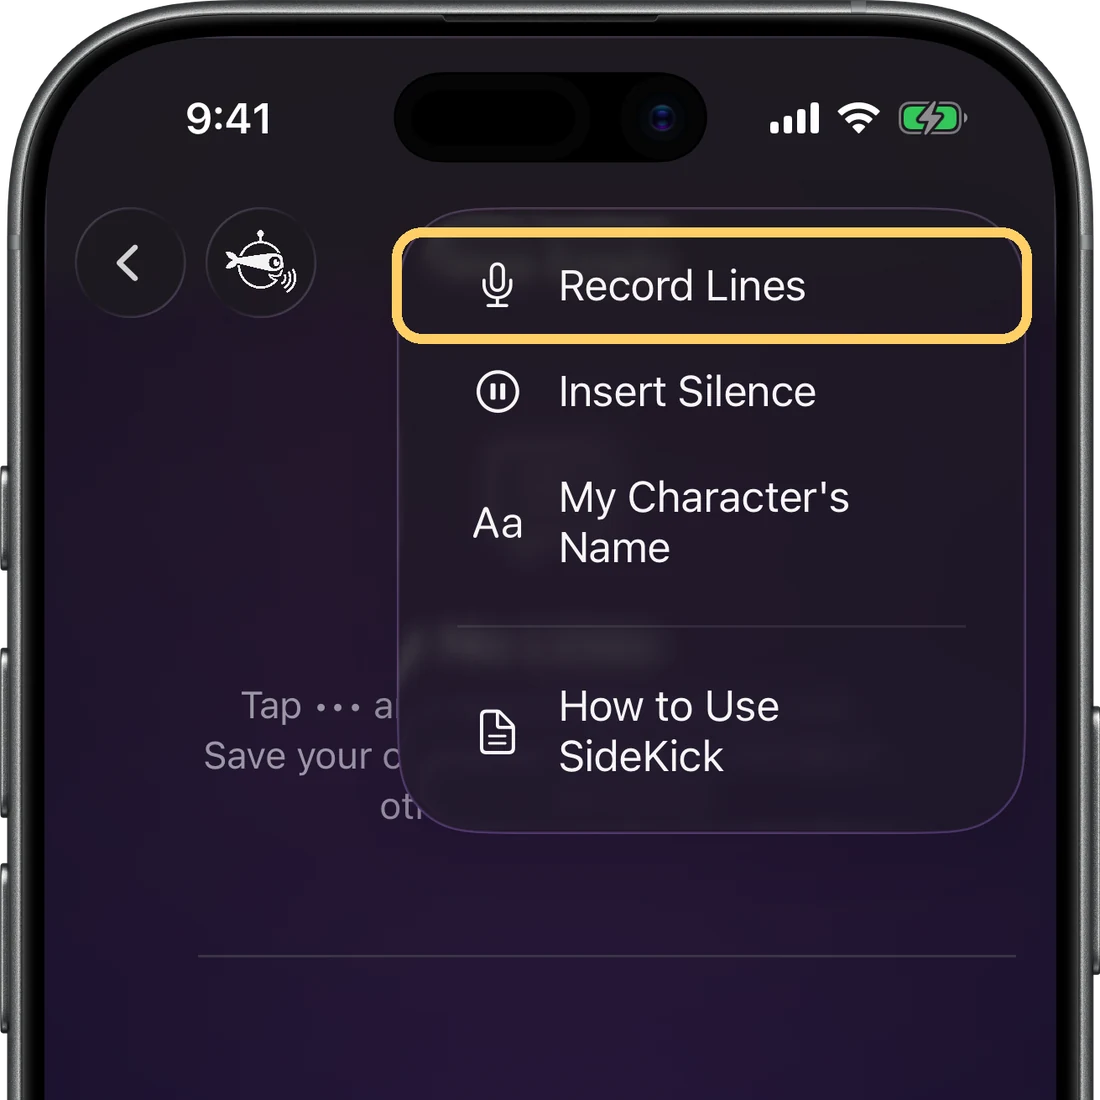
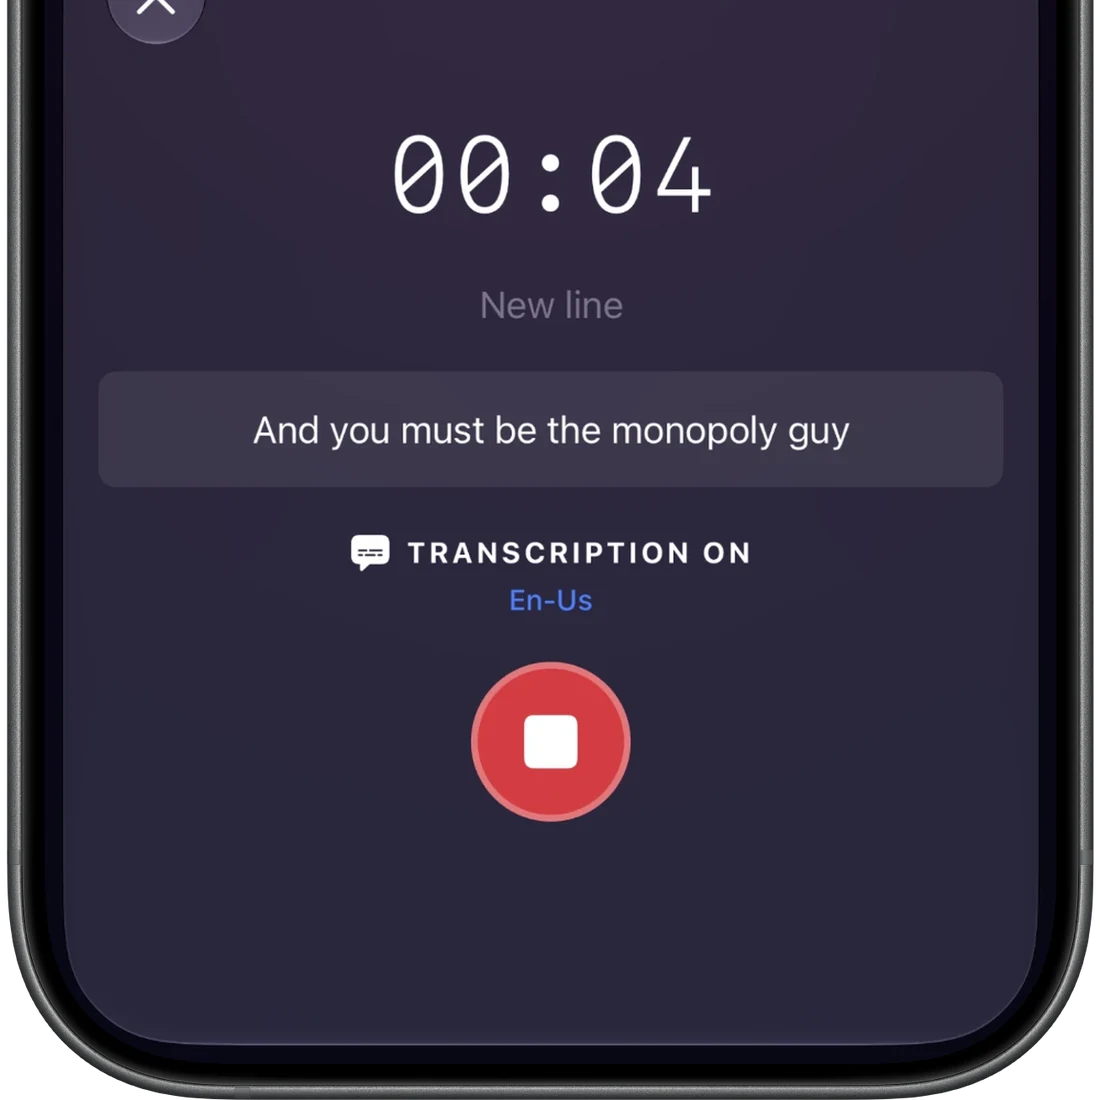
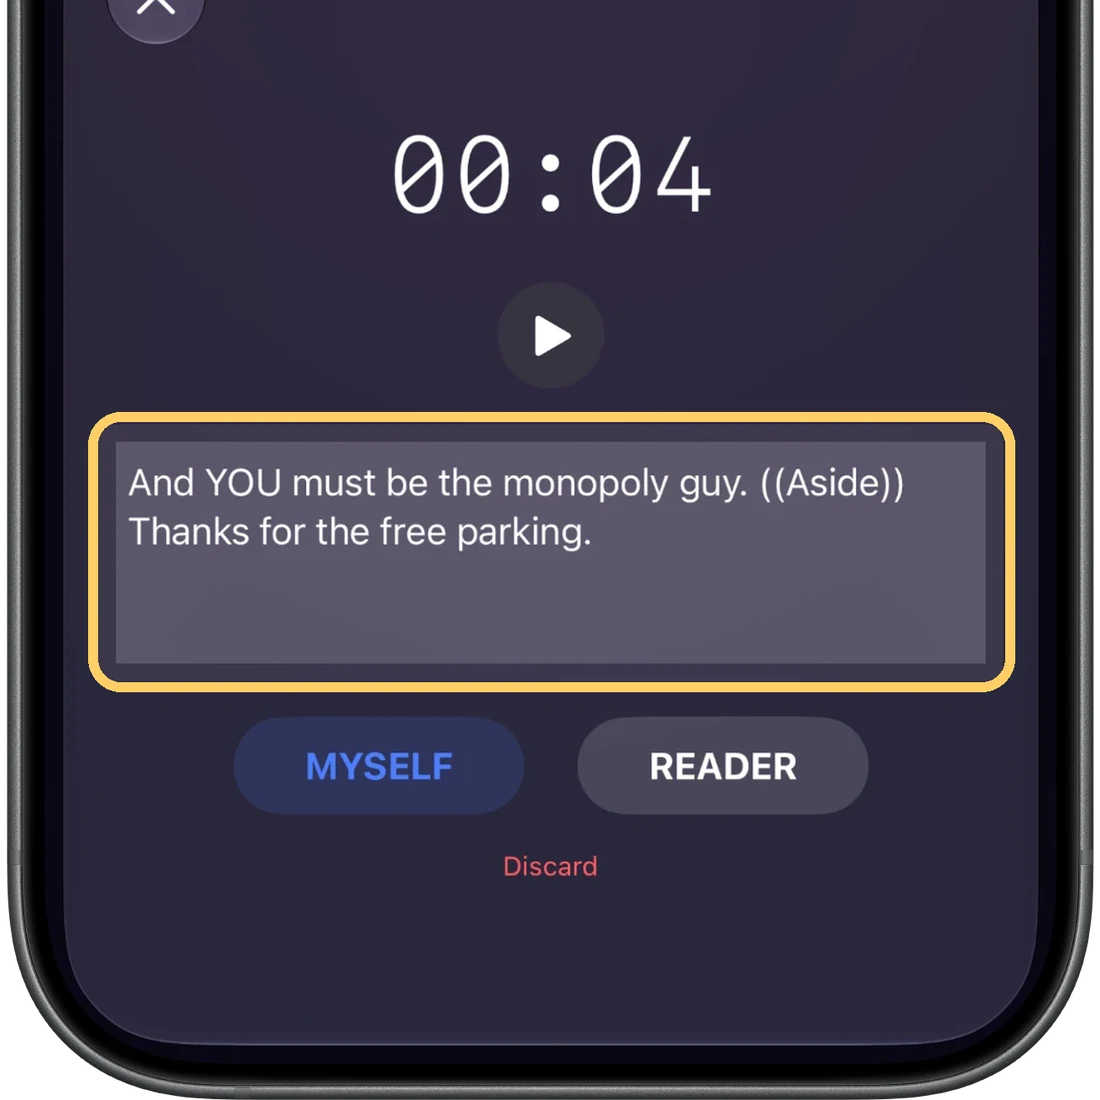
 SideKick 101
Use a double parenthesis to add a parenthetical stage direction like this: ((beat)). It'll appear as a normal parenthetical on its own line, just like in a script.
Not happy with a take? Discard it and speak the line again.
Questions & answers
Cue mode keeps missing me.
Simple Cue listens for the last two words of a line before advancing. Smart Cue listens to your whole line and advances once it has recognized enough, then waits for a short pause (adjust it with Pause before advancing). A quiet room helps, but speech recognition isn't perfect even in ideal conditions, and there's nothing worse than getting to the end of a self-tape and having Cue miss your last line. For self-tape reliability, use Tap mode with a Bluetooth shutter remote, or an Apple Watch.
It's not hearing me, or the camera won't start.
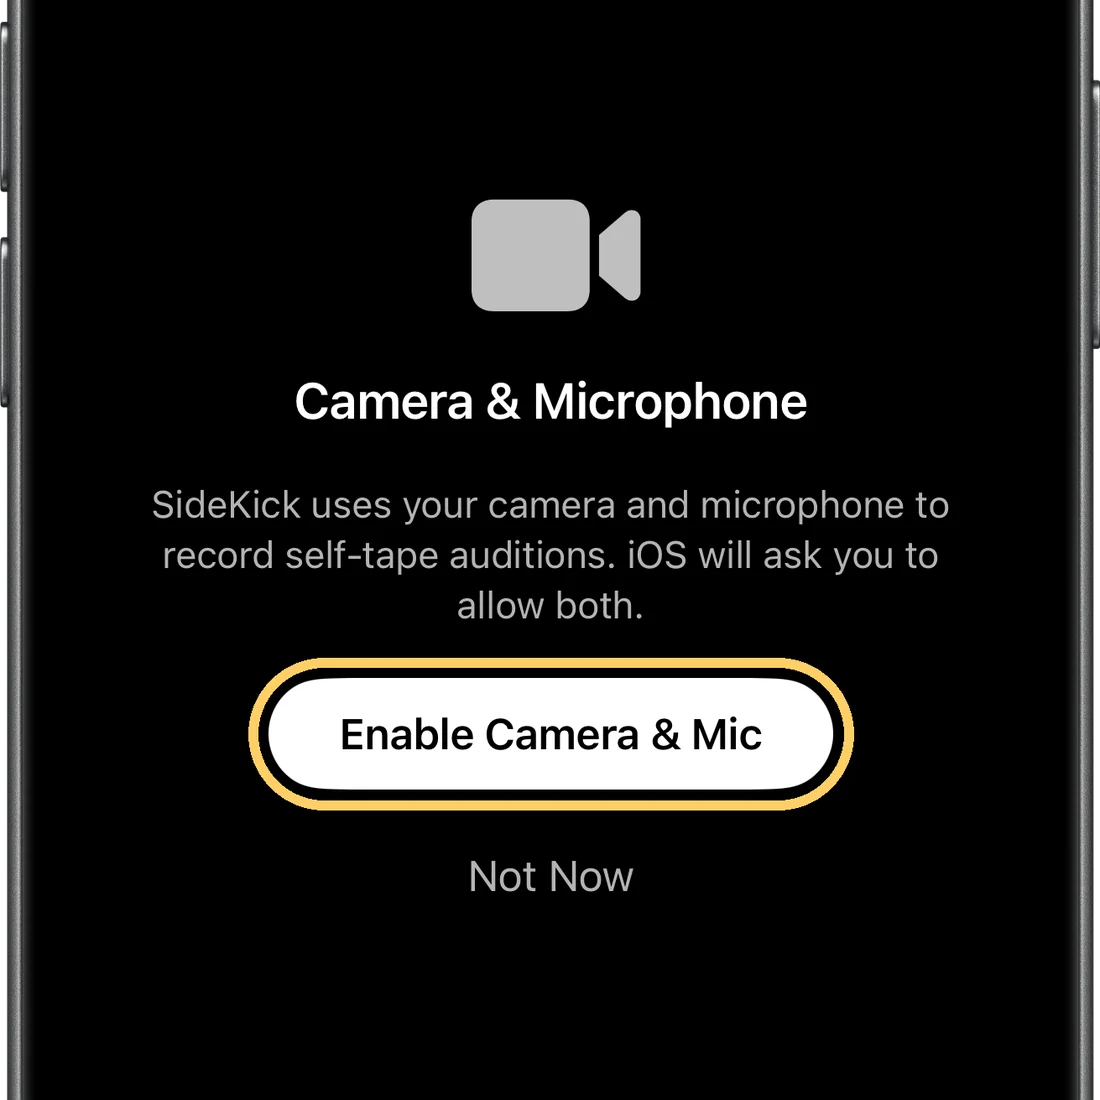
Almost always permissions. Go to iOS Settings → SideKick and turn the microphone, speech recognition, camera and Photos back on. If the camera is denied, the camera screen shows Open Settings, which takes you straight there. A denied microphone or speech permission shows an alert with the same button.
Nothing happens when I tap on my watch.
The vibration you feel only means the watch felt your tap. Look at the antenna icon at the bottom right of the watch. If it has a slash through it, the phone has no scene open or is out of reach, so open the scene on the phone.
In Camera mode, I can't hear myself during reader lines.
This happens on all iPhones older than the iPhone 16. Improve Audio swaps in clean reader audio and lowers your microphone while the reader speaks. This means anything you say during a reader line is muted. Wait for the reader to finish before you speak.
I used a Bluetooth speaker to tape my audition. Why am I missing some options in the review screen?
When you use a Bluetooth speaker, SideKick does not insert a clean version of reader lines. So some of the controls would do nothing, and are therefore hidden to reduce confusion. Reduce Background Noise and the "My Voice" volume slider will still work!
My take disappeared.
Closing the review with X on a take that isn't pinned or saved to Photos asks "Discard this take?" first. If you confirm, it's gone. Tap Pin to keep a take in the app, or Save Raw or Export to save it to Photos.
Can I use a USB microphone?
Yup! Connect it, then use the speaker and microphone buttons in camera mode. See Speakers & microphones above.
Why can't I use an AirPlay speaker?
AirPlay is incompatible with SideKick. It adds about a 2-second delay before every reader line, so it unfortunately is not supported.
I have a question, problem, or suggestion that isn't covered in this guide.
Happy to help! Just shoot an email to help@sidekick.actor